Winter 2013 Snow Conditions

It’s refreshing and reassuring to read bits like this in the local avalanche report:

“In the last few years our snow has been more unstable than not and the danger rating Low rarely got used.  As a forecaster, writing Low for our entire area feels weird and unfamiliar, but our data and field trips have led us here.  We are not throwing caution to the wind, but to be honest, on our days off we are skiing lines, climbing routes and traveling in the backcountry like it’s a Low danger.”

– Doug Chabot, from the 2013-01-23 Gallatin National Forest Avalanche Center daily bulletin

EDC for the Bicycle Commuter

Bicycle commute EDC


I ride my bicycle to work and for many of my errands year round and as such the potential for a mechanical is always in the back of my mind.  Fortunately a few simple tools are all that are necessary for most repairs.  The other key repair element not pictured is a telephone – because 9 out of 10 times you can just call a friend to come pick you up!


  • adjustable wrench
  • tire levers
  • multi-tool
  • tube patch kit
  • tube
  • pump
  • snickers
  • sunglasses
  • flashlight
  • paracord

What items are you carrying that differ from mine?  The gear pictured above differs when I’m on a trail ride, a road ride, or an overnight tour and lighter options of much this kit exist. I find a balance of weight, functionality, cost, and other factors come into play.

Ruck, Pulk, and Christmas Tree

Sam pulls a Christmas tree with his pulk sled and GORUCK GR1

It’s been many months since I’ve taken the time to write or share photographs about my adventures of this summer or fall and now, as we’ve solidly moved into winter here in Bozeman I felt like sharing about an outing my fiancee and I took this past weekend.  We loaded our workhorse of a pulk sled along with an axe, Swede saw, my GORUCK GR1 ruck, and a Christmas tree cutting permit into the back of the Landcruiser and headed up into the Hyalite region of the Gallatin National Forest to find our tree.


We have tall ceilings in our apartment so we set out to find a 10+ foot tree that had nice symmetry, even branch spacing, and the right height.  We drove a snowy forest service road off the main paved road for a mile or so until we came a zone we felt would have the right tree.  We then set out pulling the pulk sled strapped to the GR1 and walked about a mile and a quarter in a circle marking potential trees using a GPS app on my smartphone.  After walking the loop we settled on the best of three trees we liked and set out to chop ‘er down.


Sam chopping on a Subalpine Fir

I did the face cut with my axe and then came in for the back cut with my less-than-sharp Swede saw (I tend to buy things from thriftstores).  After felling the tree we loaded it up onto my Otter sled complete with a DIY pulk system I built last year and pulled it up a nice, steep hill to the waiting Landcruiser.


1990 Toyota Landcruiser FJ62 with Christmas Tree atop Roof

We took the backroads home so we could drive nice and slow to avoid desiccating the trunk anymore than necessary.  That evening we invited friends over for Elk fajitas, beers, and an ornament hanging session.


Packrafting Overnighter – Beartrap Canyon

Bear Trap Canyon

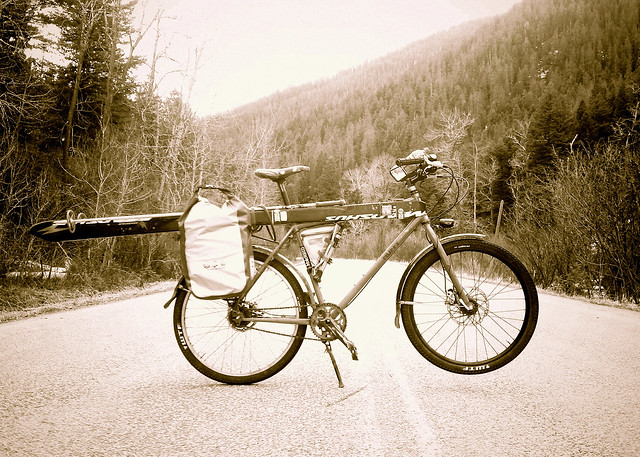
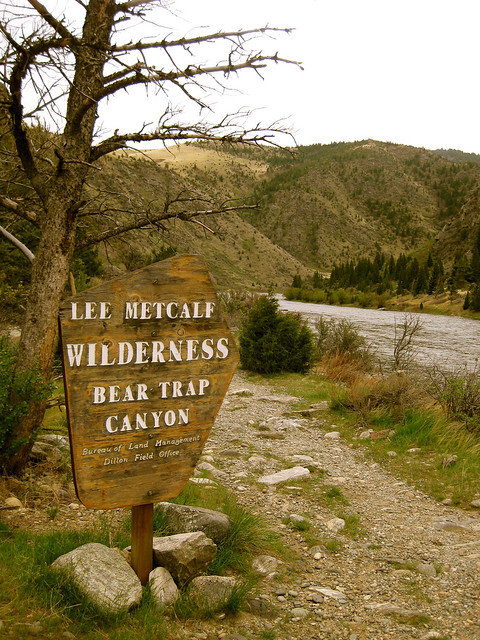
Although many feet of new snow began to fall in the high country on Thursday evening last week and friends were planning bids on a local peak I’ve wanted to ride for sometime I couldn’t get the idea of either bicycle touring or packrafting out of my brain.  The ski trip group was leaving on Friday night and since I had a prior commitment it solidified my plans to head out into the woods on Saturday afternoon.  Rain fell steadily most of the day Saturday and it was cold but my excitement level was high as I drove my trusty Toyota 40 miles to the West to a little chunk of Wilderness called Bear Trap Canyon.


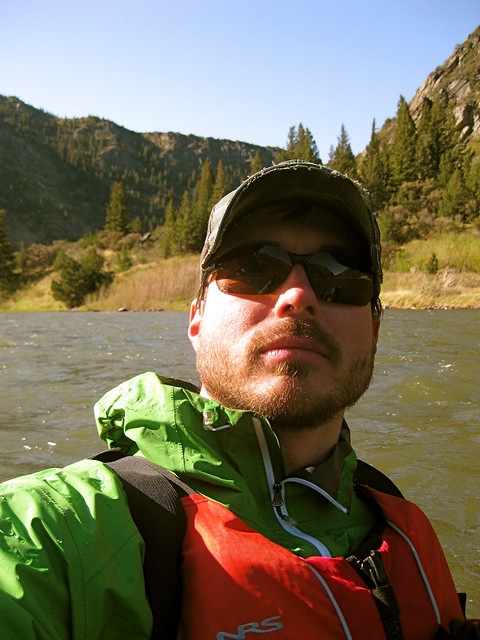
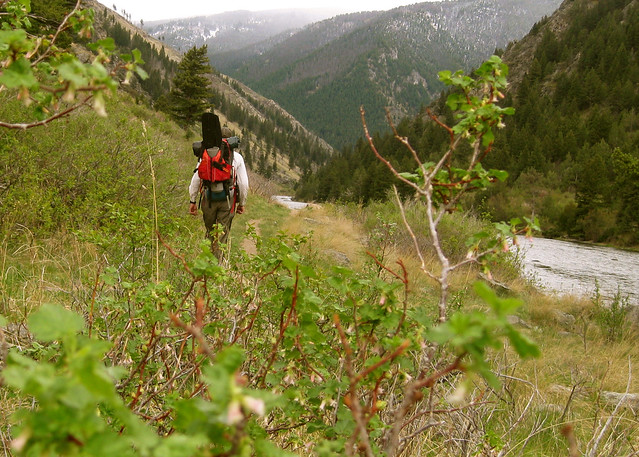
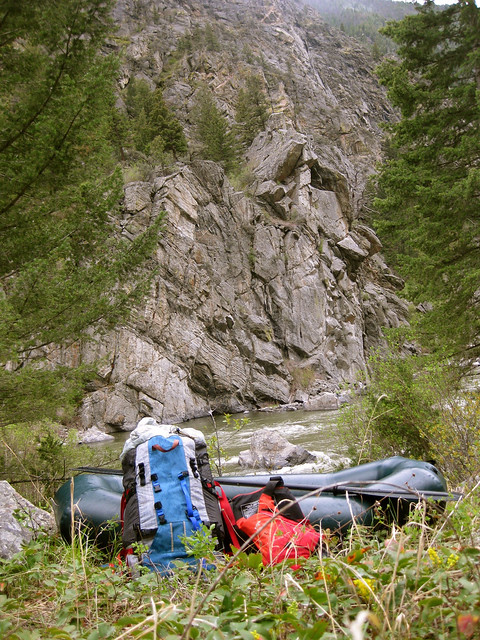
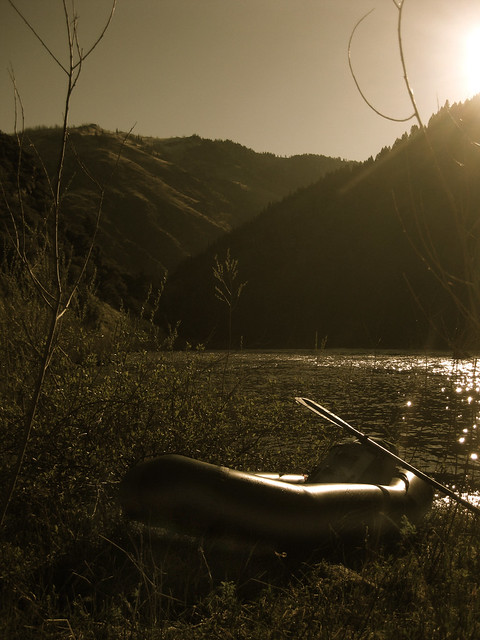
In tow was my workhorse pack, eVent bivy, PFD, rain gear, cooking supplies, and a vintage Alpacka packraft (sans spray skirt).  I left the trailhead at approximately 16:30 planning to hike either until 18:00 or until I reached the base of a class IV / V rapid that would mark my put-in the next morning.  I reached the rapid a few minutes before six and opted to inflate the boat, pack it with my gear and ferry across the river to a level area that looked prime for camping.  I hadn’t been in a raft in a couple seasons so it felt good to handle the paddle and feel the current as it swept me out of the river-side eddy.  My pulse quickened as I paddled at a 30 degree angle toward the opposite shore, then spun halfway ’round to back ferry to a good take-out.

Packing a raft

After about fifteen or twenty minutes of hunting for the perfect flat spot to lay my bivy I was delighted to stumble upon a small chunk of flat ground with a beautiful sandy beach just below it.  One nicety of camping on the opposite side of the river from the trail and practicing Leave No Trace camping techniques is that a pristine and beautiful campsite can be found that puts the typical dirty, packed-out USFS social sites that appear along popular trails to shame.

Alpacka raft and gear along Madison River.

Integral Designs South Col bivy

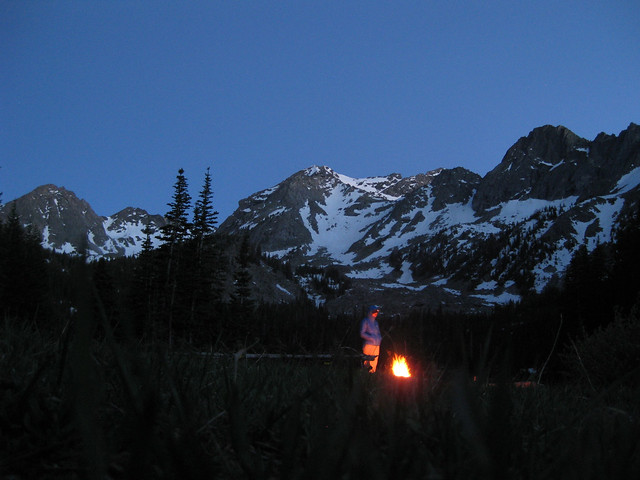
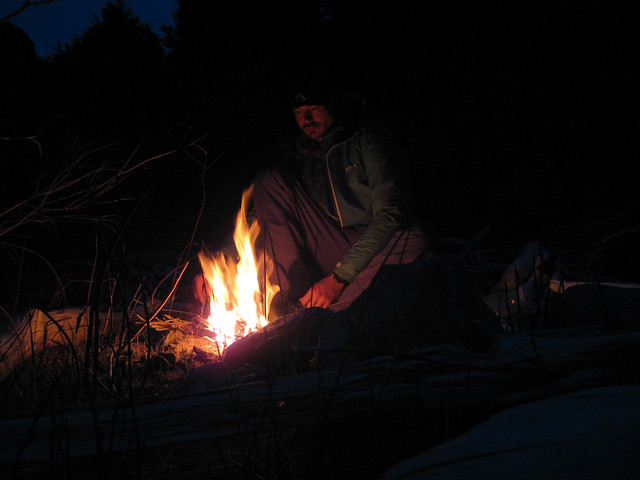
The beach made for a nice cooking spot located 10 or 12 meters from my sleeping spot.  A bit too close for typical grizzly bear country but I opted to not worry too much and just went with it.  The sand on the beach also allowed me to dig a small pit in which I built a campfire starting at nightfall.  There was plenty of dry driftwood and I was able to remove almost all trace of the fire the next morning leaving my camp very pristine.

I awoke at 6:30 to temperatures around 37 deg F (3 deg C) having zipped my bivy completely closed over my face around 4am to keep warm.  I had chosen my 180gsm synthetic quilt paired with a 240gsm hoody.  For sleeping mats I had a 3/8″ foamy atop a torso-length inflatable.  The foam backpanel from my pack also pulls out and I supplemented my underfoot insulation with this


Around 7am I climbed forth from my cocoon, pulled down my bear hang, lit up my Caldera Cone and brewed up a cup of Nescafe along with some warm water for my granola.  It was early and I savored the time outdoors listening to the river flowing along at 2,700 CFS.  I hadn’t been packrafting in quite a long time so I had feelings of trepidation but was also excited to float this fun few miles of water.

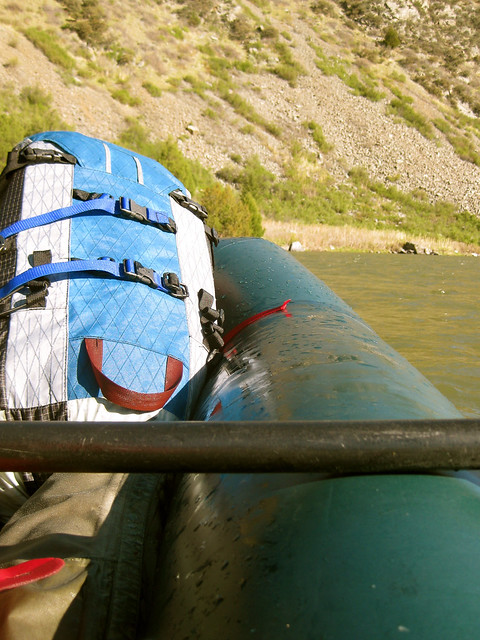
After breakfast I quickly packed up my gear and strapped my back to the bow of the boat after being sure to temper and re-inflate everything so the tubes were as full of air as possible.  The section of river I was about to float had plenty of class II and III rapids and I wanted as much maneuverability as possible.


The boat I’m using is pretty ancient and has no seat nor spray skirt so I folded my inflatable sleeping mat to use as a seat and tucked my rain pants and gaiters in as much as possible to help with the inevitable wave over the front of the boat and pushed off.  The walk into camp the previous day paralleled the river so I was able to make mental notes of the majority of the flow except for the very first section I was to encounter which was hidden below a cliff.  I opted to ferry immediately across the river, exit my boat and scout the upcoming section.  I determined it was too difficult for me to attempt given that I was both out of practice in packrafting and also paddling solo.  I portaged 50 or so meters around the rapid and re-entered the river this time floating the remaining 3 +/- miles continuously except for one break in which I stopped to empty water from the boat and another in which I held onto a rock giving myself a moment to scope an upcoming section of waves.

It felt really good to get out on my first post-winter season trip.  It was short but provided the opportunity to make use of both my backpacking gear as well as the packrafting equipment.  I look forward to continuing using the raft on some upcoming trips this summer as well as sharing some words and photos.

Asphalt and Corn: Biking and Skiing

Yesterday morning after a very positive job interview (which I look forward to sharing more about in the near future) my buddy Mike sent me a text about going for a bike ride. We’d been talking about strapping our skis to our bicycles and heading up the most popular mountain access road in Bozeman – Hyalite Canyon. At this time of year the Forest Service gates the road to motorists for reasons based on impact but bicyclists are still allowed to enjoy the dry, clean pavement. The road winds about five miles (8km) and gains a few thousand feet of elevation which means its a great climb followed by an even better descent.


Mike and I planned this for the later afternoon so it wasn’t within our time constraints to ride directly from town and up to the mountains so we can’t claim pure smugness for this trip. We loaded bikes, skis, poles, boots, clothing, water, warm-temp ski wax, and panniers into Mike’s Suby and headed out.


Arriving at the trailhead and setting up the bicycles with ski gear is fun for a couple gear/bike dorks like Mike and I. The best part of it is living in a town like Bozeman doesn’t even proffer up a bunch of goofy what-the-hell-are-you-doing looks from other trailhead users. People just give you a nod of approval or a vocal ‘way to get after it!’


We had a great, albeit short ride up the asphalt road, then down a dirt and snow covered side road up to the snow line. Mike and I both chose to ride our “townie bikes” which have +/- 2″ MTB tires which made for a good choice given the multiple surfaces we rode upon.


From here we transitioned to skis and other than having to walk three short sections of dirt we were able to ski about four miles of pretty decent corn snow. We applied some Swix warm-temp wipe on wax before setting out which kept the snow from sticking and provided good glide.


Mike and I both ski on Madshus Epoch skis and were really enjoying the control that the shape and edges provide. In the downhill sections of our ski we were both making alpine turns in the slush and whooping with enjoyment. Mike skis in a Fisher BC NNN boot and I ski in a Rossignol 3-pin boot.


SuperUltraHeavy Winter Trip

The United States Forest Service has a series of cabins, fire lookouts, and other shelters available for rental at a nominal cost all over the country. In SW Montana there is a LOT of federal land and therefore there are a LOT of these rental cabins. Navigate your way to recreation.gov to see for yourself.

######

Spanish Creek Cabin

######

A couple weekends ago my lady, a friend of hers, and myself put some winter gear into a big ol’ Otter Sled (designed to normally be pulled behind a snow machine) that I hand fashioned into a pulk and set off for a four mile ski to the Spanish Creek Cabin in the Northern Madison Range of the Gallatin National Forest.  I was prototyping a pulk system that I will ultimately build onto my Mad River Rocket sled using a far lighter and better performing system.  I plan to cover this in more detail in a later post.

######

SuperUltraHeavy Pulk System

######

As you can see in the above photo weight was of absolutely NO CONCERN whatsoever.  I set three Rubbermaid tubs on the floor in the living room and told the ladies that if it fit into the tub I’d pull it in the pulk.  Water, food, sleeping bags, pillows, books, wine, beer, slippers, warm clothing, you name it – it all went in.  They each wore a small backpack with the day’s water and food in it and I wore a pack that I put my sleeping bag into (simply to give it some shape).  I attached the pulk with a couple carabiners and set off through the sticky snow.

######

The hike into the cabin is along an asphalt road that is not plowed in winter so the gradient is very mellow.  The area is very windblown however and given the low snow levels of the season there were many portions that contained exposed asphalt.  About a 1/4 mile into the ski I removed my skis, placed them onto the pulk and walked for about two miles over asphalt, hardpacked ice/snow, and through minimal drifts.  At about the two or 2.5 mile mark the snow levels increased and I was able to ski with the load behind me.

######

The system I was prototyping for the pulk uses a commonly-known method of two five foot lengths of PVC pipe crossed in an “x” pattern and connected to the hipbelt of the pack.  I ran lengths of rope through the PVC pipe for this prototype but the final version will not use rope.  The “x” pattern tracked behind me on uphills and downhills very, very well.  It did roll over on my twice when I was attempting some sidehills that were simply too steep.  I estimate however than in my upcoming design the load will ride much lower (aka no more spacious Rubbermaid tubs) and will therefore allow me to attempt steeper slopes with a lower center of balance.

######

This was also the first overnighter I took using the Madshus Epoch skis I procured this year.  In the past years all of my backcountry travel has either been on snowshoes or via my splitboard but I have been entertaining the idea of using a set of skis that would allow me to focus on making miles quickly and easily on trips where descending wasn’t the primary focus (as with splitboarding).  I chose the Epochs because they allow for excellent edging and control in offtrail as well as groomed trail situations.  To complement the ski I went with a vintage three-pin Rotefella Telemark binding and the Rossignol BCX11 boot.

######

Madshus Epoch skis, Rotefella 3-pin binders

######

Rainier

######

DIY Hat Access Solution

DIY Hat Access Solution

Cord and cordlock girth-hitched to shoulder strap of  backpack for hat storage.


When ski touring I use variations of a trucker cap, a winter hat, and the hood of my merino hoody to thermo-regulate during uphill travel. When the winter hat becomes too warm I cinch it into this simple cord system I attached to my pack to keep it ready for quick access.