Photo © Mark Genito
Sleeping outside in winter is cold. On top of that it gets dark early and campers often find themselves with little to do other than build a fire and sit around it sipping whisky. Don’t get me wrong fires and a flask amongst friends is a wonderful way to spend an evening but staying active is a far, far better way to stay warm. Some people choose to hike by headlamp into the evening thereby maintaining their warmth. Another way is to spend the afternoon and first hours of darkness building a snow shelter. Not only will building it keep you warm but sleeping in it can bring even the most frigid of temperatures up to a tolerable level.
Recently two friends and I set out on skis and snowshoes a half day’s walk into the woods with the intent of finding a good spot to practice and learn how to build an igloo. I have been reading about this topic for a number of years both online and in a couple of books. My favorite snow shelter tutorial is in “Allen & Mike’s Really Cool Backcountry Ski Book”. I did exhaustive online research some years ago on this topic and was dissatisfied with the tutorials I found. Perhaps there are many quality write-ups igloo building. Regardless I hope this post will add to the knowledge base for others wishing to try building a shelter of this type.
How to Build and Igloo – A Photo and Descriptive Tutorial
The following tutorial is both photographic and descriptive in nature. The photos will be paired with a description as detailed as I feel is necessary to describe the necessary action. Please feel free to use the comments section at the end of the post to discuss my techniques, describe tips and tricks you may have, or to ask me and other readers questions.
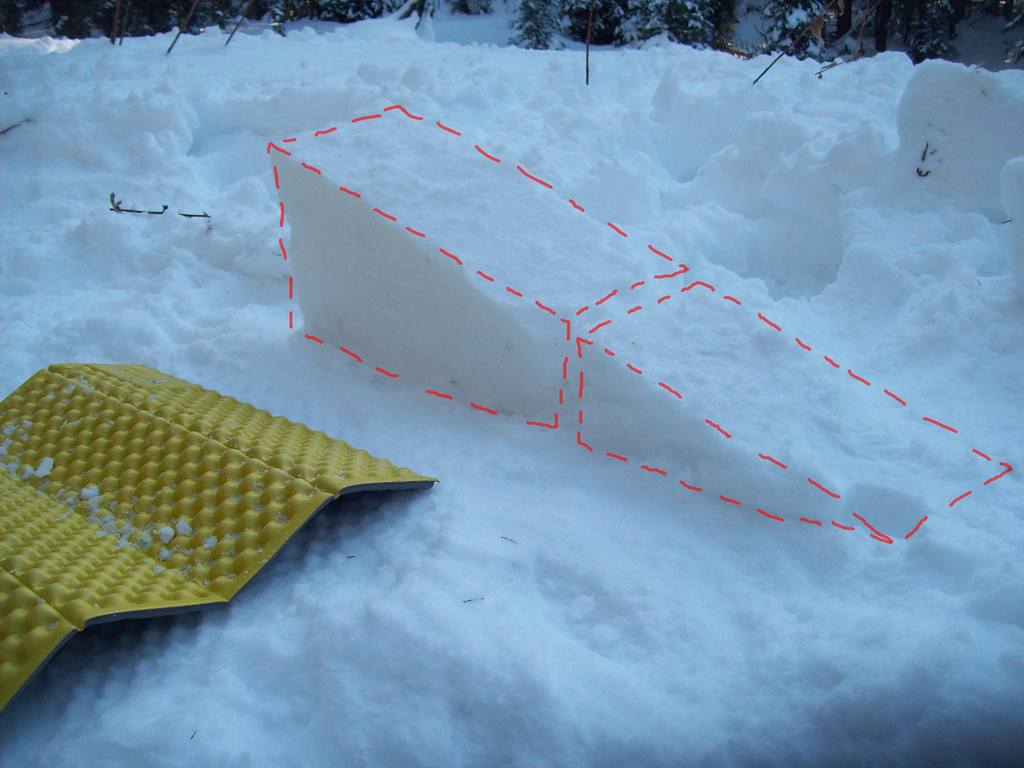
Step One – Snowblock Quarry Site
An igloo is constructed from blocks of packed snow. In order to cut these blocks you must first layout and prepare a quarry from which to cut them. Mark out an area approximately two ski lengths by one ski length. Begin to walk back and forth, up and down, around and around, and generally all over this area. Jump up and down, beat on it with shovels, and mash the snow down and around as much as you can. Put on your skis or snowshoes and then walk all over it a bunch more. The area will begin to harden the longer you work on it. The amount of time this takes will be dependent on the quality of the snowpack. Sugary faceted snow will take the longest, and snow with higher water content will take less time.

Sam work-hardens an area of snow that will become the quarry from which to cut snow blocks.
Once you’re done work-hardening the snow you can move onto the next step as the block quarry will now require about one hour of time to simply set up. Leave it be, make a note of what time it is by your watch or the sun and then be patient.
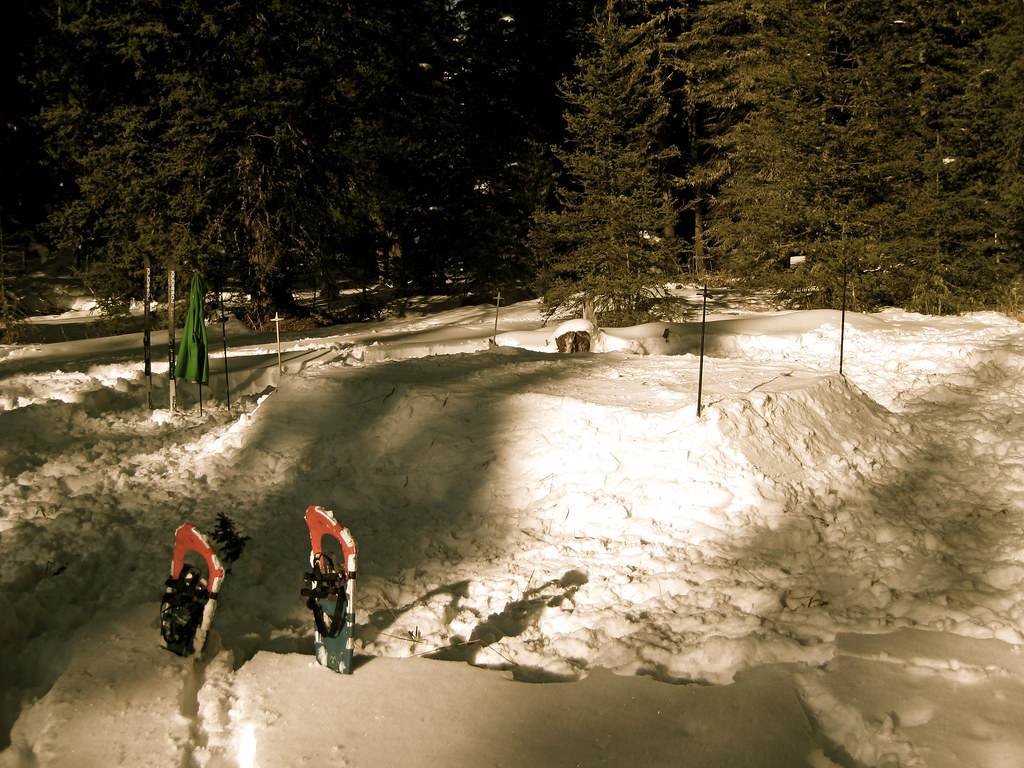
The block quarry marked with ski poles and completely packed out.
Step Two – Site Selection
While your block quarry is setting up you can begin to find the specific spot that your igloo will be built. The ideal location will be close to your block quarry so that you don’t have to carry blocks too far. As you would do when picking any camping location take into consideration coverage from the elements, nearness to water, elevation in relation to adjacent landscape, et al. The footprint of a snowshelter of this nature can be sizeable so finding a place that is relatively level and large enough is ideal.
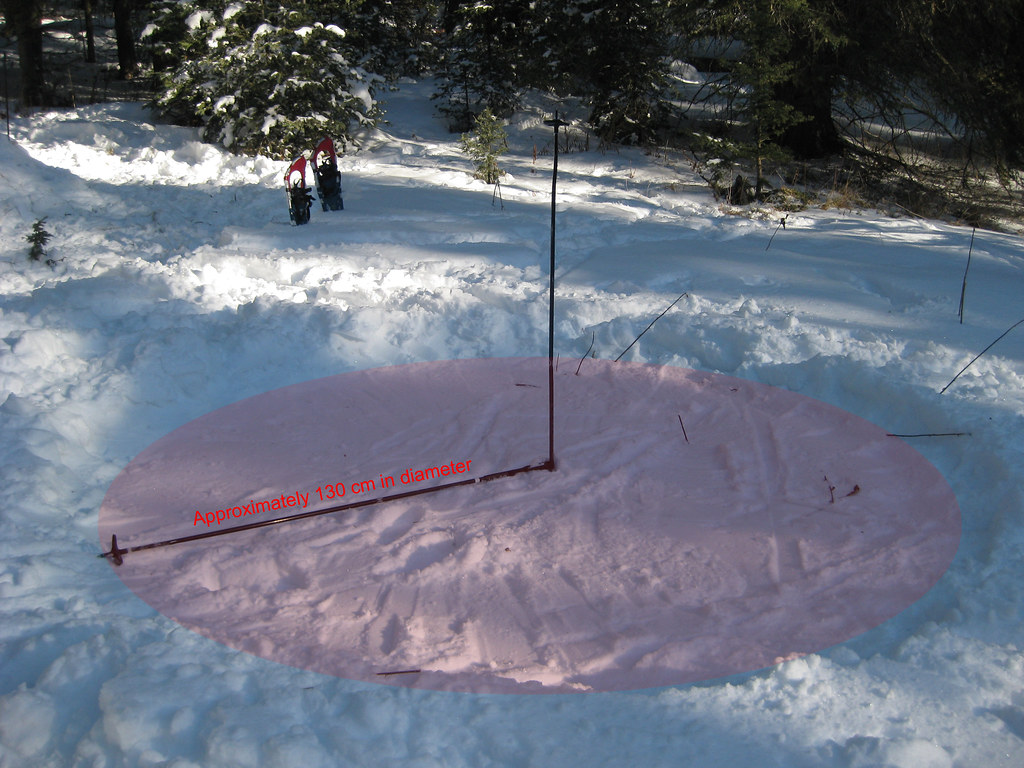
Put one ski pole in the center of your building site, use the other to mark out a radius by “etching” the snow with the pole basket.
Once the specific site of your igloo has been determined tamp it out by walking around on it a bit. It’s not necessary to work harden this area like you did with the quarry but hardening it out a bit will provide a solid base for laying block on. Planning the specific radius of the igloo is a crucial step that will determine the size of your igloo when all is said and done. We were planning to all sleep inside and my reading proved that a 130 centimeter radius would be sufficient for a two to three person shelter.
Step Three – Cutting Igloo Block

Using your shovel roughly prepare the front and top of the block quarry into smooth surfaces that will form the first row of cut block.
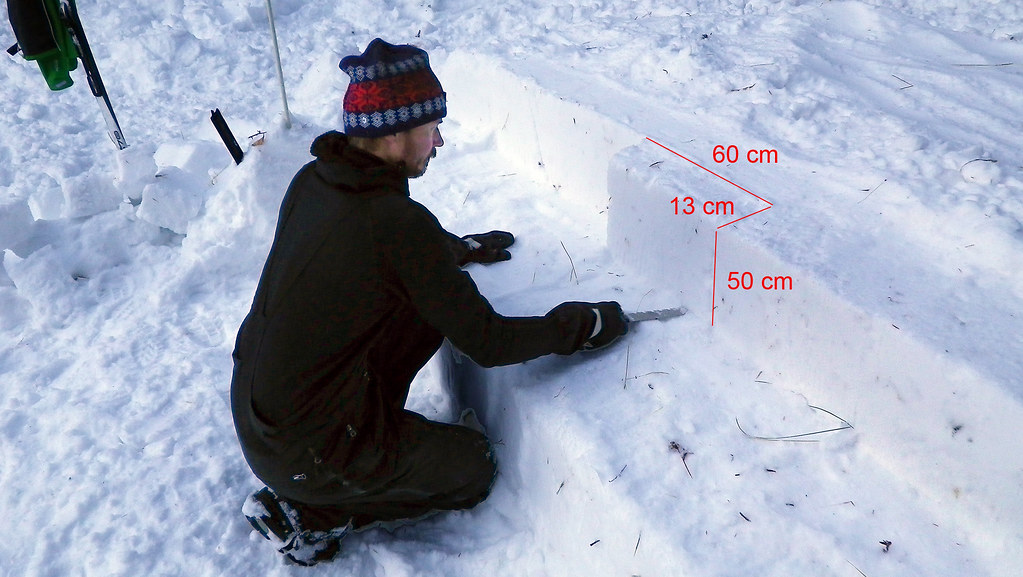
Sam cuts igloo blocks.
Now the patience and waiting is over and it’s time to really get to work. If you’ve work hardened your snow enough you can begin to saw blocks from your quarry. Size can vary but 60 cm x 13 cm x 50 cm makes a block of excellent strength that’s not too heavy to transport. Use measurements etched onto your snow saw or cut sticks to specific length to mark out each block before cutting it. Use precision and accuracy at this stage of the process because the blocks will create a far stronger and better looking shelter if they are sized precisely the same those next to it.
To cut the blocks first make your cuts along the sides and rear. Lastly, saw the bottom of the block. When the saw finishes the last few centimeters of the bottom cut the block will drop down ever so slightly. Place your saw blade behind the block and pull toward you slightly. The block will tip forward and fall into the waiting arms of the person on your team who’s job is to begin moving blocks to the building site.
Step Four – Laying Out the First Course of Blocks
The wall of your igloo will be one block in thickness. Each block must lean slightly inward so that as your build upward the wall closes on toward the center and ultimately closing completely in on itself. Do not take this notion lightly. If you don’t lean the wall inward enough your igloo could become too tall by the last courses for your to reach the upper blocks. Leaning it inward too much will of course not leave you much headroom so attempt to weigh these options against each other continually as your are building.
The first block that is placed requires a special cut (as does the very last which will be discussed later) but the rest will typically all be of the same size. Cut the first block into two pieces as shown in the photo below. This will form a ramp for the second course of blocks to rise upward onto and over the first course once it’s come full circle.
The ramp formed by the first block
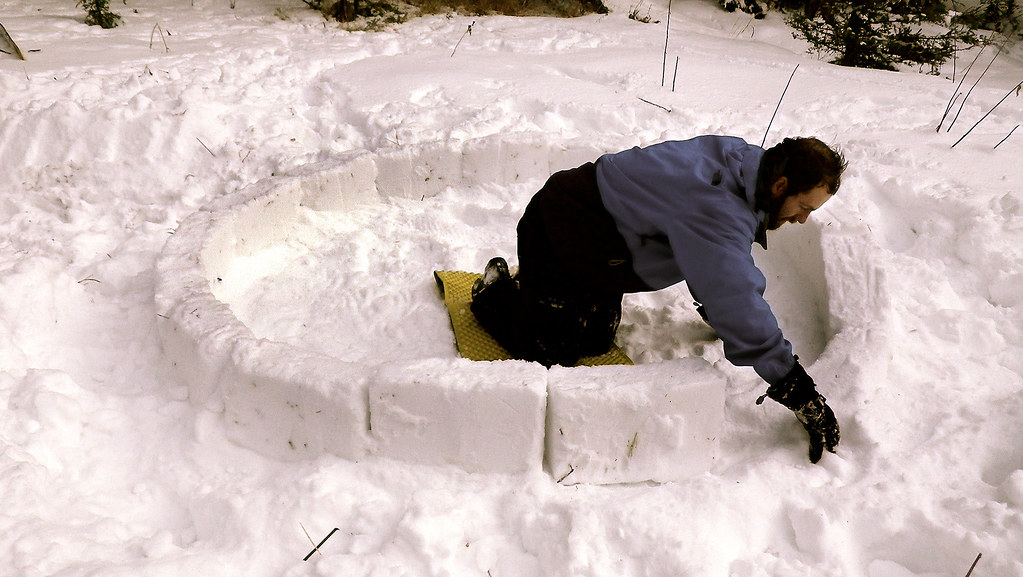
Jon preparing to lay the last block of the first course.
Step Five – Continuing the Block Wall Upward
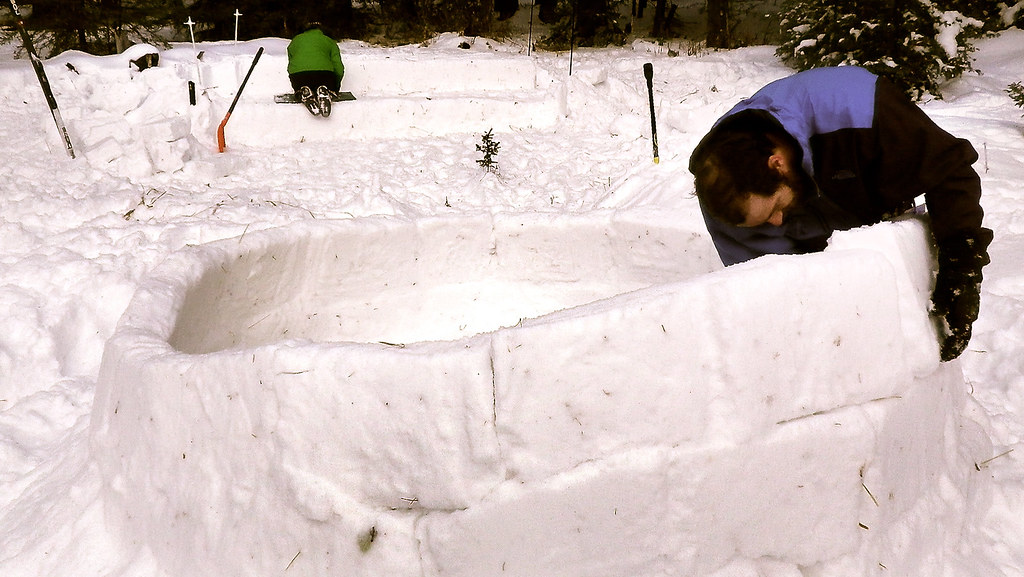
The upper courses
In the photo above note how the second course of blocks ramps upward onto the top of the first. Also note at the rear wall the inward lean of the blocks. Lastly, look to the background of the photo you can see the block quarry and Sam cutting blocks. Sam has a foam sleeping mat under his knees to stay warm and Jon is standing on one inside the igloo to keep his feet warm.

Sometimes the blocks lean into the previous one, set up nice and quick and the builder can simply move on. Other times they need to be held in place as the snow sinters together. It is often nice to have a second set of hands to help with this job as seen above where Mark and Jon are both holding a block in place.

A ski pole can act as a prop to hold blocks in place while the builder tends to other parts of the construction.
In the photo above the handle of a ski pole is being used but flipping it around and using the basket end is even better as it spreads the surface area out.
Step Six – Chinking
As the blocks are leaned one next to each other there will undoubtedly be gaps that appear here and there. The person hauling block from the quarry can have a shovel handy to use to throw light snow onto the gaps. Where larger holes appear small chunks of snow can be used as chinking material to fill them.
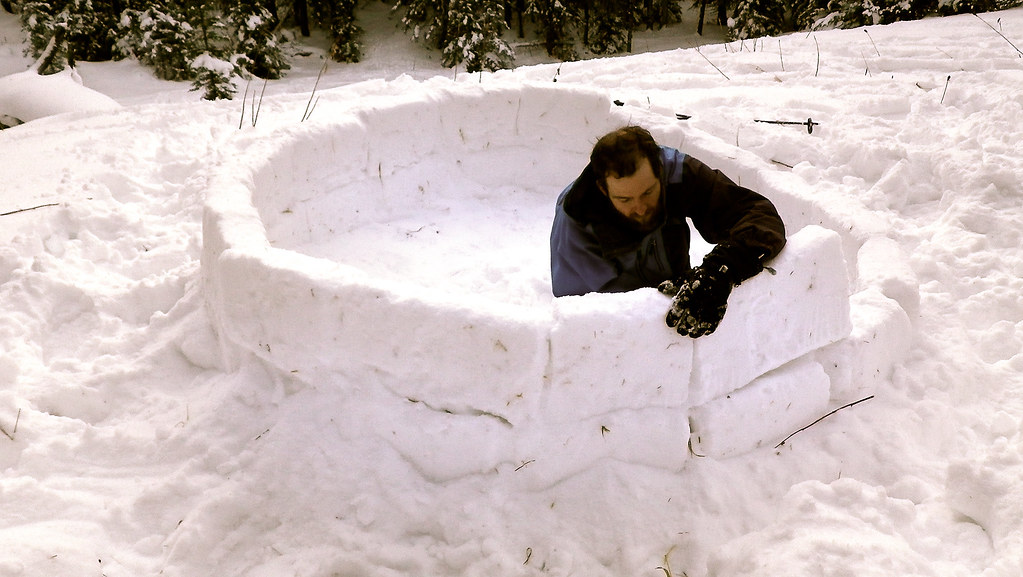
Note the slight gaps in between the blocks. These will tend to get larger as the wall progresses higher and the blocks lean inward more significantly
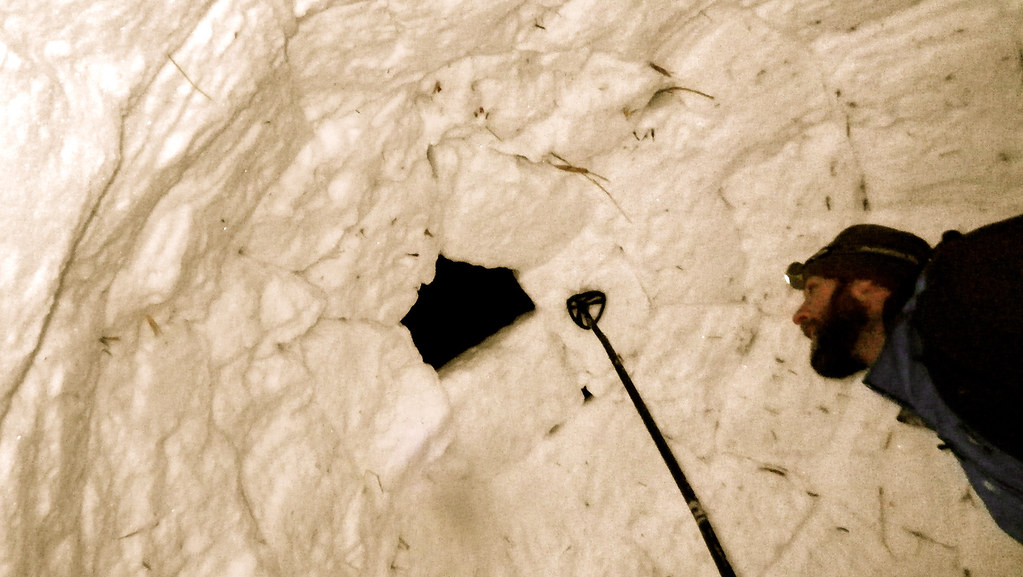
Step Seven – Cutting the Door
Once you’ve reached four or five courses of block high you will begin to have trouble passing snow blocks over the wall. At this time it will be safe to cut a door into the side for passing block to the builder who has been stuck inside and may also enjoy the chance to escape for a breather. This door will eventually become the entrance to the igloo but keep it small at this time to maintain the overall wall strength as long as possible.
Using your snow saw simply poke a hole in the wall of the igloo at the base and begin sawing in an upward arc to create a half-dome shaped hole. Place the door into the wall so as to put as little pressure on any one particular block that gets affected by it’s own weight not having anything holding it up from below. It may be helpful to cement the joints between all the blocks associated with the door so they are cemented together especially well before cutting. This will be especially important once the doorway is enlarged to fit a human body.
Step Eight – The Final Block
When the block wall finally reaches the apex of the igloo there will be a solitary hole left. Using your snow saw, cut a block to fit the last hole and either force it up and into place or drop it down onto the hole from above (assuming you are tall enough).
Jon contemplates the final puzzle piece.
Step Nine – The Entrance Tunnel
At some point in the build process the person originally designated to cutting snow blocks from the quarry will finish that task and while the builder (inside) and the block-carrier (now the outside builder) continue to place block the quarry-person can begin to work on the entrance tunnel.
The ideal location of the entrance to your igloo will start about 50 cm below the level of the sleeping platform and then step up and into the igloo to meet the sleeping platform. This elevation difference will act as a cold-sink and cold air will be less likely to enter the igloo and warm air inside will be less likely to exit.
Dig a trench in the snow outside the igloo up to where the small door is that was cut earlier. There will most likely still be block debris lying about near the quarry and also probably more packed snow available to cut block from. Using the debris block and more blocks that you cut build a tunnel that leads to the door. This tunnel will act as a wind block to the entrance.
To erect the tunnel either use a technique similar to the igloo walls wherein each side of the tunnel slopes inward to form a curved entrance. Otherwise simply build two vertical walls and then lay large blocks across the top to form a square entrance. Build this structure from the outside inward toward the igloo so that there is a gap between the tunnel and the igloo structure until the last possible minute. This will allow easier access for the outside builder to pass blocks to the inside builder. Keeping out of each other’s way is key to efficiency.

Sam works on the entrance tunnel. Note the clothing choice – waterproof clothing is essential to staying dry while building a snow shelter
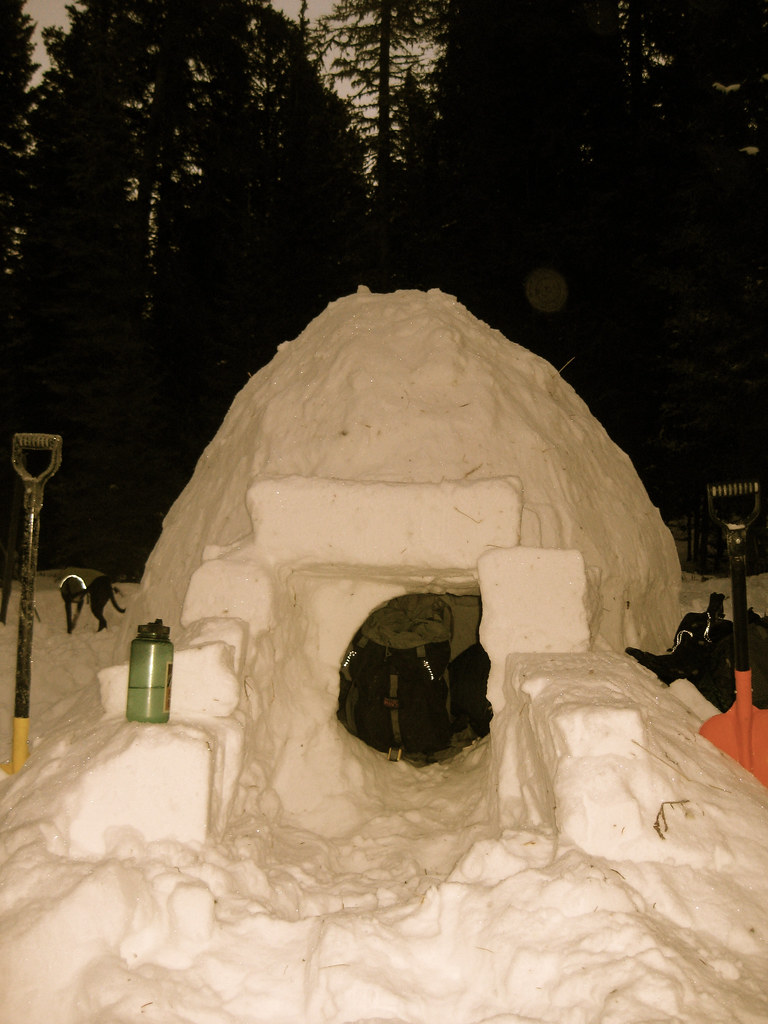
The igloo as viewed down the tunnel. Note the slight slope upward and onto the sleeping area inside. Ideally this would step up significantly more but we were working with a low snowpack.
Step Ten – Admire your Work
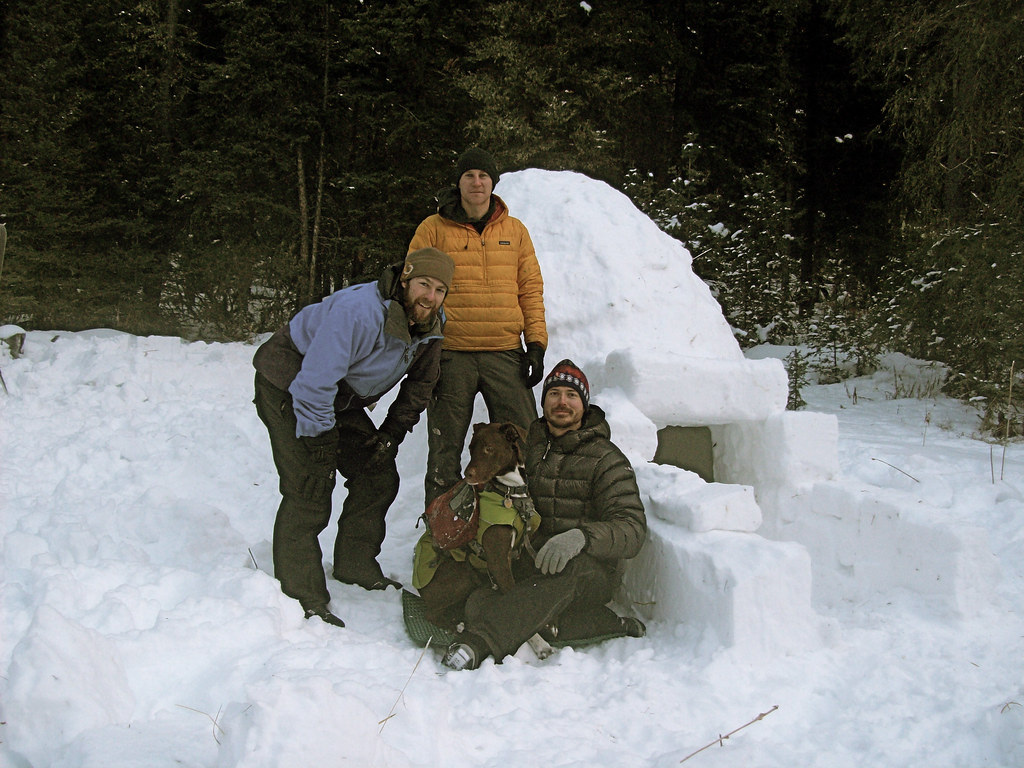
Jon, Mark, Gordie Howe, and Sam

The finished project