How to Build an Igloo


Photo © Mark Genito


Sleeping outside in winter is cold. On top of that it gets dark early and campers often find themselves with little to do other than build a fire and sit around it sipping whisky. Don’t get me wrong fires and a flask amongst friends is a wonderful way to spend an evening but staying active is a far, far better way to stay warm. Some people choose to hike by headlamp into the evening thereby maintaining their warmth. Another way is to spend the afternoon and first hours of darkness building a snow shelter. Not only will building it keep you warm but sleeping in it can bring even the most frigid of temperatures up to a tolerable level.


Recently two friends and I set out on skis and snowshoes a half day’s walk into the woods with the intent of finding a good spot to practice and learn how to build an igloo. I have been reading about this topic for a number of years both online and in a couple of books. My favorite snow shelter tutorial is in “Allen & Mike’s Really Cool Backcountry Ski Book”. I did exhaustive online research some years ago on this topic and was dissatisfied with the tutorials I found. Perhaps there are many quality write-ups igloo building. Regardless I hope this post will add to the knowledge base for others wishing to try building a shelter of this type.


How to Build and Igloo – A Photo and Descriptive Tutorial


The following tutorial is both photographic and descriptive in nature. The photos will be paired with a description as detailed as I feel is necessary to describe the necessary action. Please feel free to use the comments section at the end of the post to discuss my techniques, describe tips and tricks you may have, or to ask me and other readers questions.


Step One – Snowblock Quarry Site


An igloo is constructed from blocks of packed snow. In order to cut these blocks you must first layout and prepare a quarry from which to cut them. Mark out an area approximately two ski lengths by one ski length. Begin to walk back and forth, up and down, around and around, and generally all over this area. Jump up and down, beat on it with shovels, and mash the snow down and around as much as you can. Put on your skis or snowshoes and then walk all over it a bunch more. The area will begin to harden the longer you work on it. The amount of time this takes will be dependent on the quality of the snowpack. Sugary faceted snow will take the longest, and snow with higher water content will take less time.


Sam work-hardens an area of snow that will become the quarry from which to cut snow blocks.


Once you’re done work-hardening the snow you can move onto the next step as the block quarry will now require about one hour of time to simply set up. Leave it be, make a note of what time it is by your watch or the sun and then be patient.
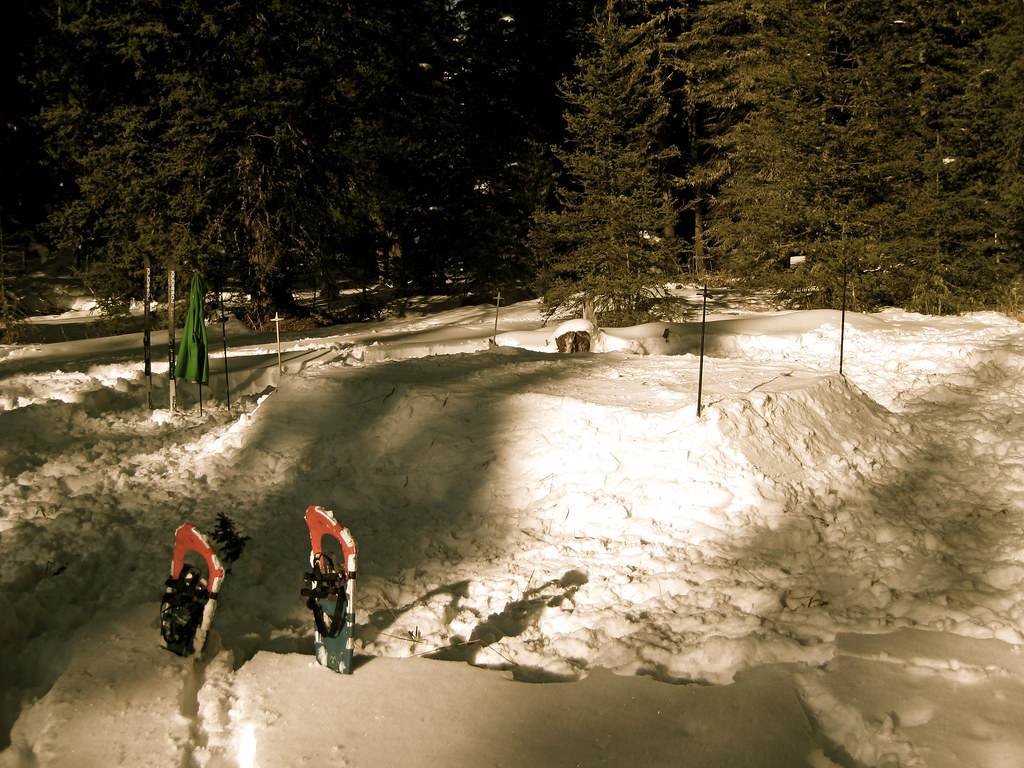


The block quarry marked with ski poles and completely packed out.


Step Two – Site Selection


While your block quarry is setting up you can begin to find the specific spot that your igloo will be built. The ideal location will be close to your block quarry so that you don’t have to carry blocks too far. As you would do when picking any camping location take into consideration coverage from the elements, nearness to water, elevation in relation to adjacent landscape, et al. The footprint of a snowshelter of this nature can be sizeable so finding a place that is relatively level and large enough is ideal.
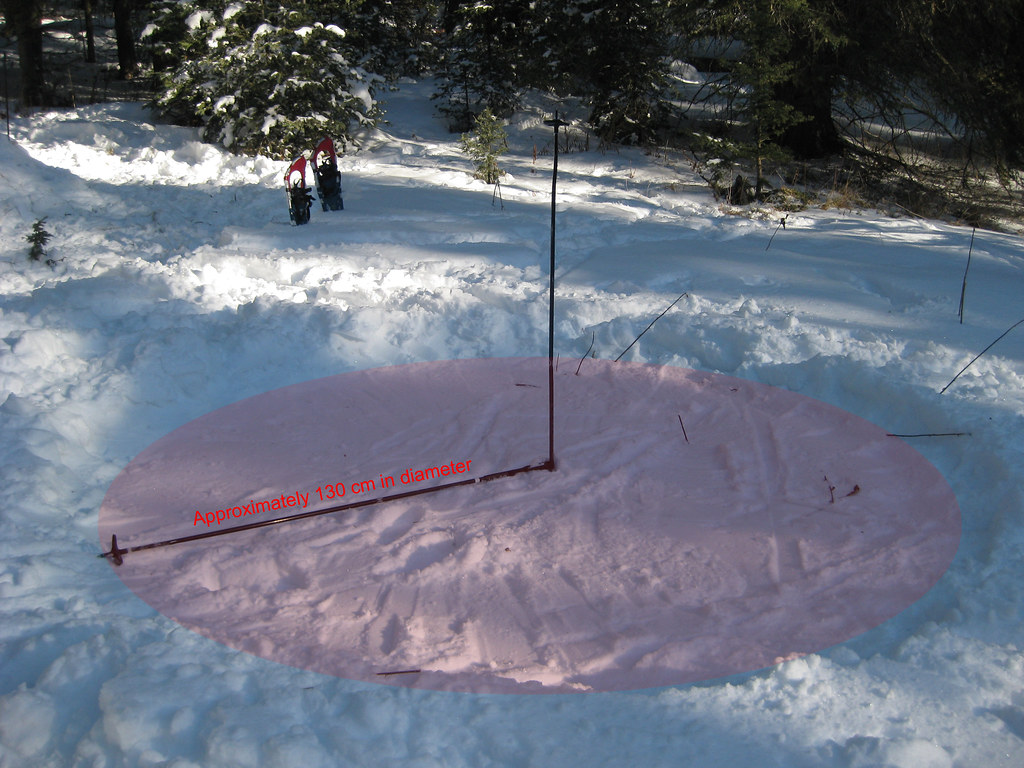


Put one ski pole in the center of your building site, use the other to mark out a radius by “etching” the snow with the pole basket.


Once the specific site of your igloo has been determined tamp it out by walking around on it a bit. It’s not necessary to work harden this area like you did with the quarry but hardening it out a bit will provide a solid base for laying block on. Planning the specific radius of the igloo is a crucial step that will determine the size of your igloo when all is said and done. We were planning to all sleep inside and my reading proved that a 130 centimeter radius would be sufficient for a two to three person shelter.


Step Three – Cutting Igloo Block


Using your shovel roughly prepare the front and top of the block quarry into smooth surfaces that will form the first row of cut block.
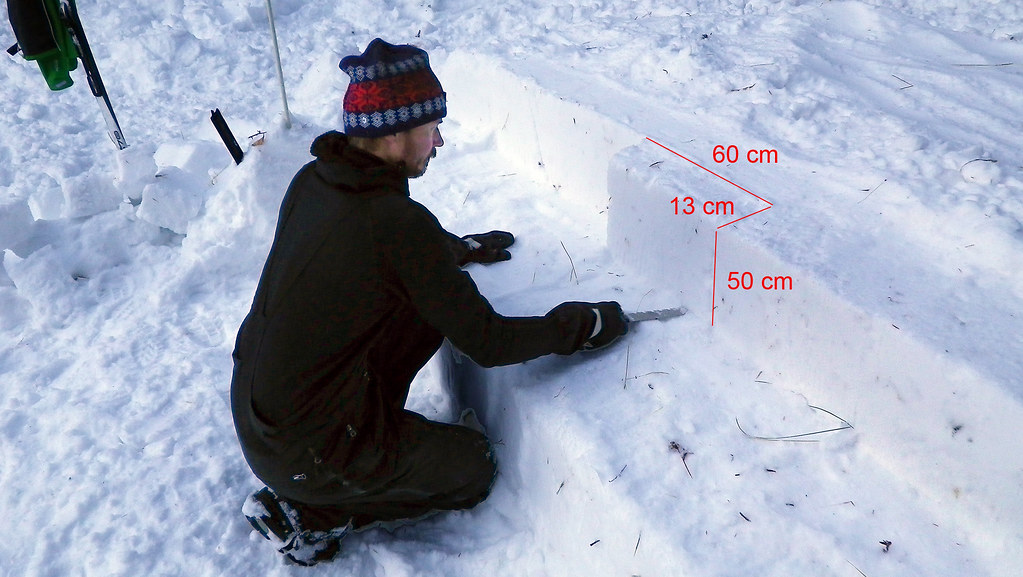


Sam cuts igloo blocks.


Now the patience and waiting is over and it’s time to really get to work. If you’ve work hardened your snow enough you can begin to saw blocks from your quarry. Size can vary but 60 cm x 13 cm x 50 cm makes a block of excellent strength that’s not too heavy to transport. Use measurements etched onto your snow saw or cut sticks to specific length to mark out each block before cutting it. Use precision and accuracy at this stage of the process because the blocks will create a far stronger and better looking shelter if they are sized precisely the same those next to it.


To cut the blocks first make your cuts along the sides and rear. Lastly, saw the bottom of the block. When the saw finishes the last few centimeters of the bottom cut the block will drop down ever so slightly. Place your saw blade behind the block and pull toward you slightly. The block will tip forward and fall into the waiting arms of the person on your team who’s job is to begin moving blocks to the building site.


Step Four – Laying Out the First Course of Blocks


The wall of your igloo will be one block in thickness. Each block must lean slightly inward so that as your build upward the wall closes on toward the center and ultimately closing completely in on itself. Do not take this notion lightly. If you don’t lean the wall inward enough your igloo could become too tall by the last courses for your to reach the upper blocks. Leaning it inward too much will of course not leave you much headroom so attempt to weigh these options against each other continually as your are building.


The first block that is placed requires a special cut (as does the very last which will be discussed later) but the rest will typically all be of the same size. Cut the first block into two pieces as shown in the photo below. This will form a ramp for the second course of blocks to rise upward onto and over the first course once it’s come full circle.
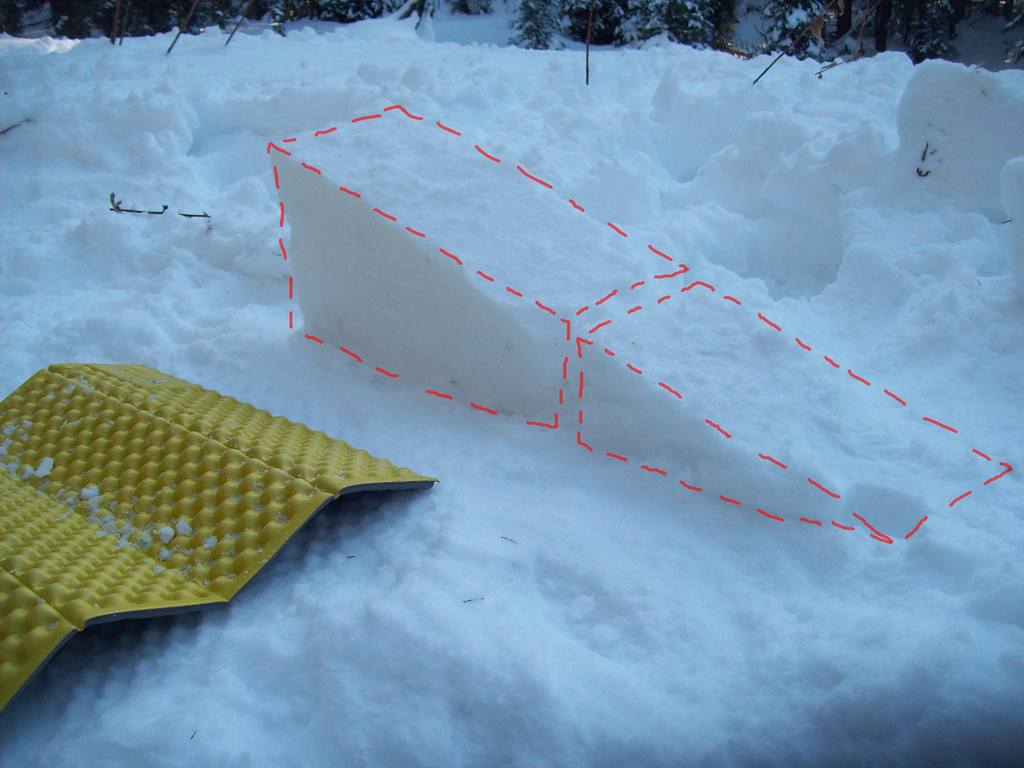


The ramp formed by the first block
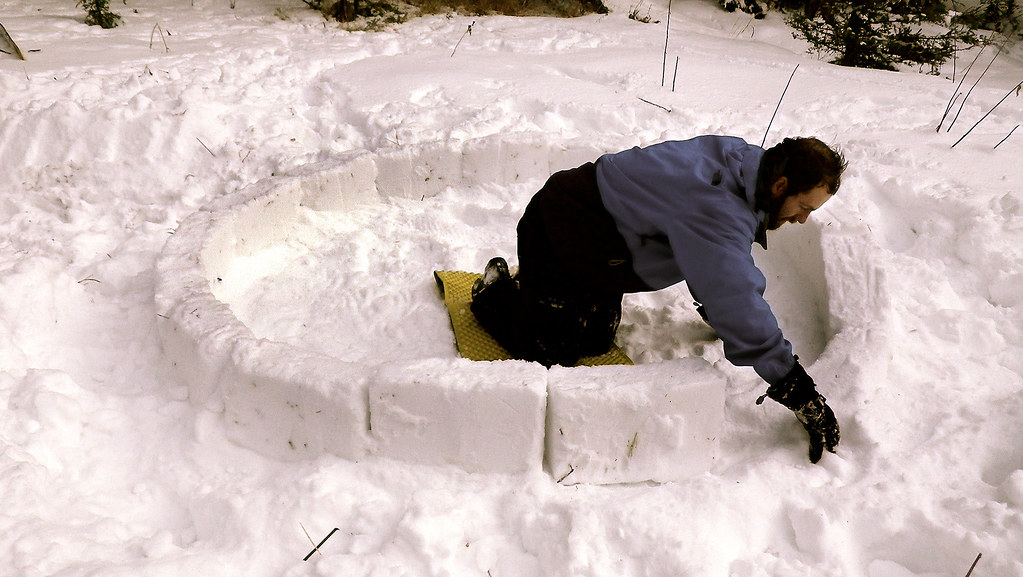


Jon preparing to lay the last block of the first course.


Step Five – Continuing the Block Wall Upward
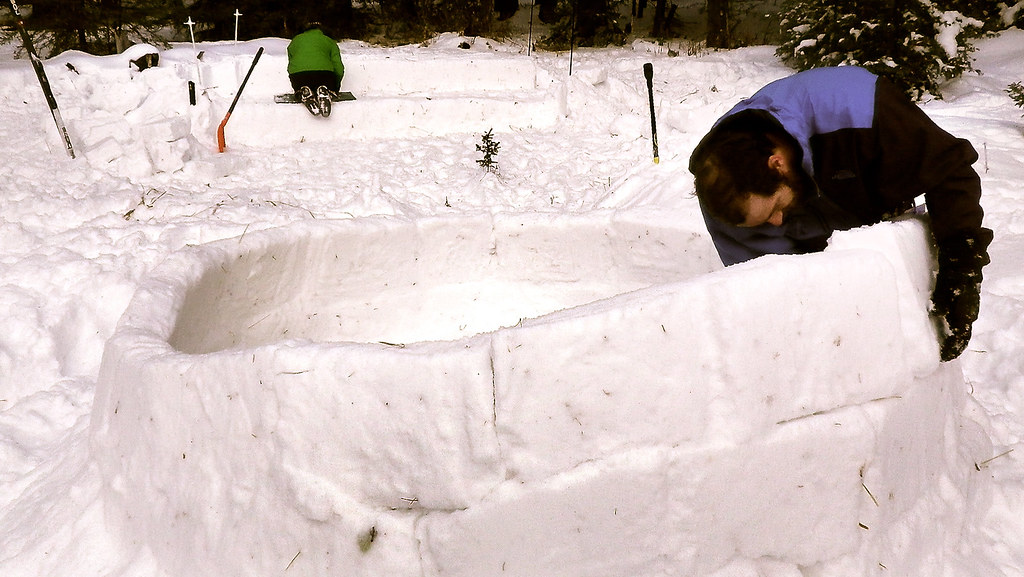


The upper courses


In the photo above note how the second course of blocks ramps upward onto the top of the first. Also note at the rear wall the inward lean of the blocks. Lastly, look to the background of the photo you can see the block quarry and Sam cutting blocks. Sam has a foam sleeping mat under his knees to stay warm and Jon is standing on one inside the igloo to keep his feet warm.
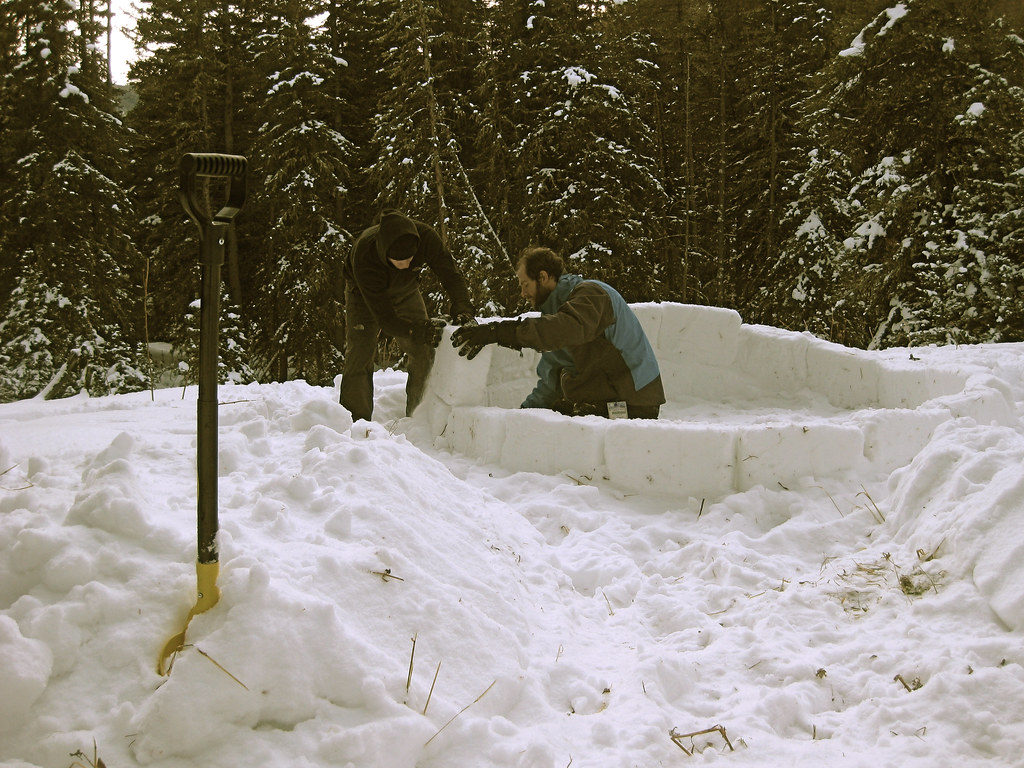


Sometimes the blocks lean into the previous one, set up nice and quick and the builder can simply move on. Other times they need to be held in place as the snow sinters together. It is often nice to have a second set of hands to help with this job as seen above where Mark and Jon are both holding a block in place.


A ski pole can act as a prop to hold blocks in place while the builder tends to other parts of the construction.


In the photo above the handle of a ski pole is being used but flipping it around and using the basket end is even better as it spreads the surface area out.


Step Six – Chinking


As the blocks are leaned one next to each other there will undoubtedly be gaps that appear here and there. The person hauling block from the quarry can have a shovel handy to use to throw light snow onto the gaps. Where larger holes appear small chunks of snow can be used as chinking material to fill them.
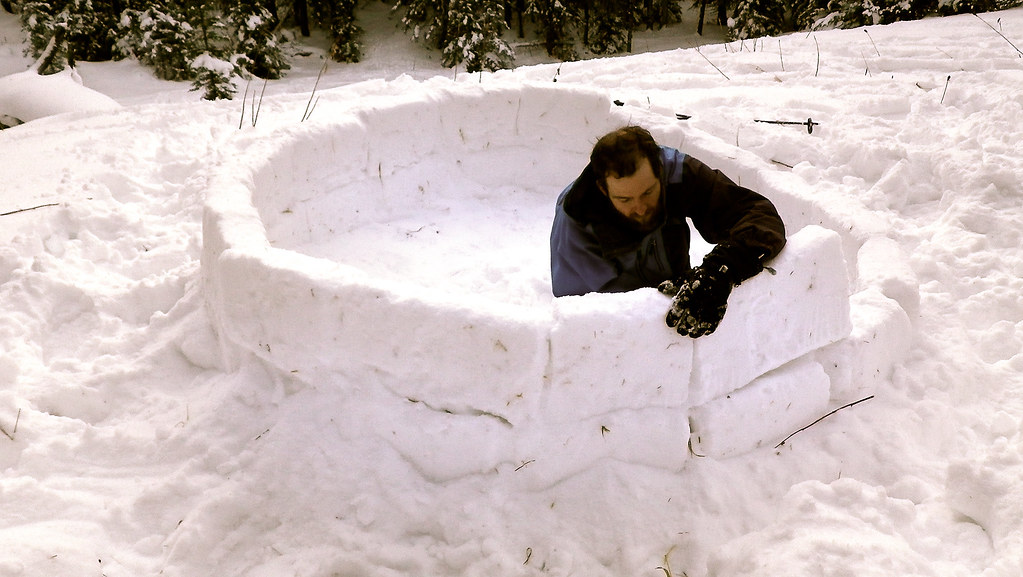


Note the slight gaps in between the blocks. These will tend to get larger as the wall progresses higher and the blocks lean inward more significantly


Step Seven – Cutting the Door


Once you’ve reached four or five courses of block high you will begin to have trouble passing snow blocks over the wall. At this time it will be safe to cut a door into the side for passing block to the builder who has been stuck inside and may also enjoy the chance to escape for a breather. This door will eventually become the entrance to the igloo but keep it small at this time to maintain the overall wall strength as long as possible.


Using your snow saw simply poke a hole in the wall of the igloo at the base and begin sawing in an upward arc to create a half-dome shaped hole. Place the door into the wall so as to put as little pressure on any one particular block that gets affected by it’s own weight not having anything holding it up from below. It may be helpful to cement the joints between all the blocks associated with the door so they are cemented together especially well before cutting. This will be especially important once the doorway is enlarged to fit a human body.


Step Eight – The Final Block


When the block wall finally reaches the apex of the igloo there will be a solitary hole left. Using your snow saw, cut a block to fit the last hole and either force it up and into place or drop it down onto the hole from above (assuming you are tall enough).
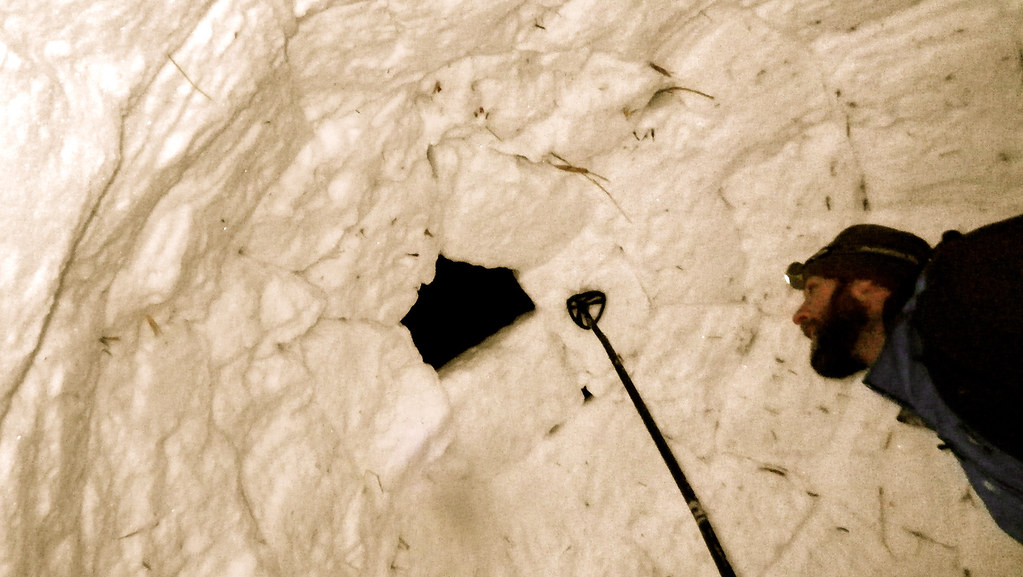


Jon contemplates the final puzzle piece.


Step Nine – The Entrance Tunnel


At some point in the build process the person originally designated to cutting snow blocks from the quarry will finish that task and while the builder (inside) and the block-carrier (now the outside builder) continue to place block the quarry-person can begin to work on the entrance tunnel.


The ideal location of the entrance to your igloo will start about 50 cm below the level of the sleeping platform and then step up and into the igloo to meet the sleeping platform. This elevation difference will act as a cold-sink and cold air will be less likely to enter the igloo and warm air inside will be less likely to exit.


Dig a trench in the snow outside the igloo up to where the small door is that was cut earlier. There will most likely still be block debris lying about near the quarry and also probably more packed snow available to cut block from. Using the debris block and more blocks that you cut build a tunnel that leads to the door. This tunnel will act as a wind block to the entrance.


To erect the tunnel either use a technique similar to the igloo walls wherein each side of the tunnel slopes inward to form a curved entrance. Otherwise simply build two vertical walls and then lay large blocks across the top to form a square entrance. Build this structure from the outside inward toward the igloo so that there is a gap between the tunnel and the igloo structure until the last possible minute. This will allow easier access for the outside builder to pass blocks to the inside builder. Keeping out of each other’s way is key to efficiency.
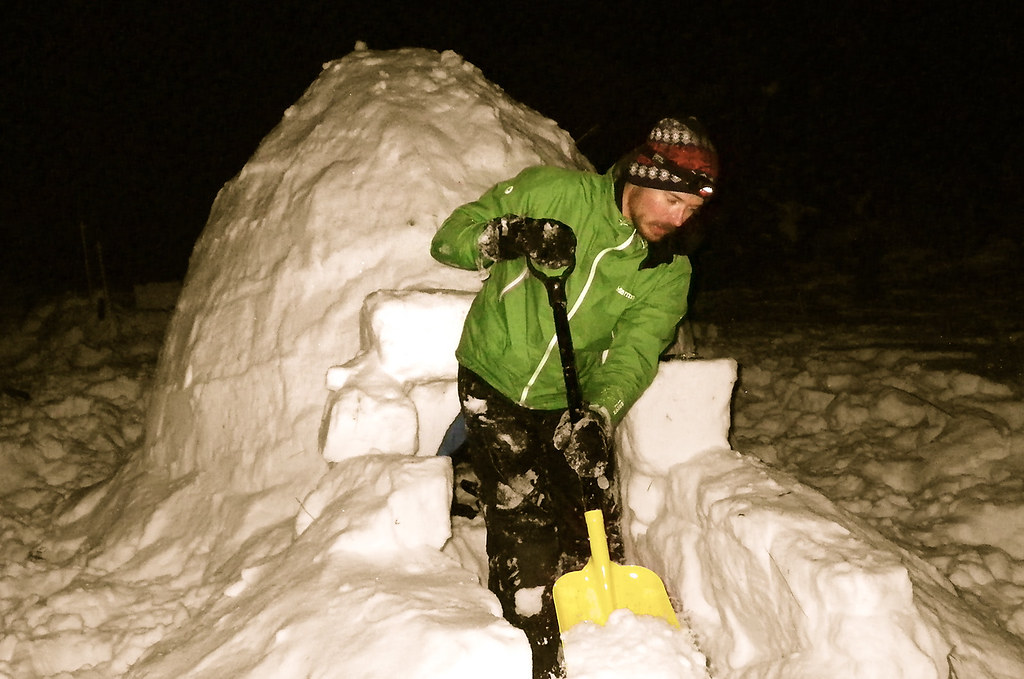


Sam works on the entrance tunnel. Note the clothing choice – waterproof clothing is essential to staying dry while building a snow shelter
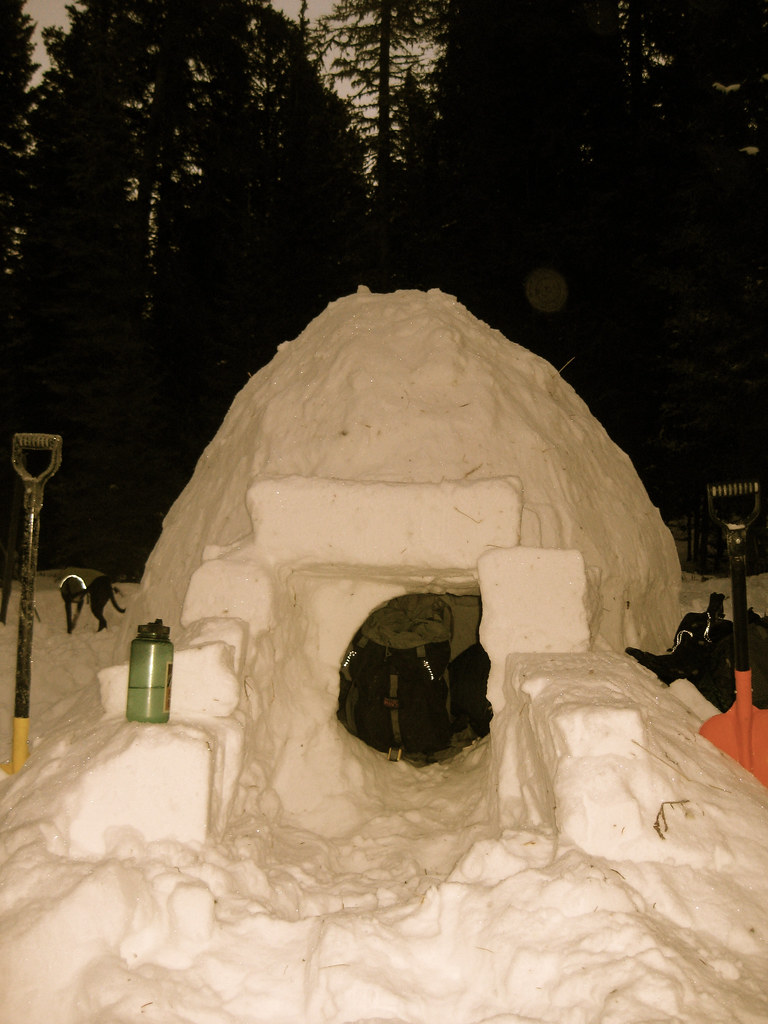


The igloo as viewed down the tunnel. Note the slight slope upward and onto the sleeping area inside. Ideally this would step up significantly more but we were working with a low snowpack.


Step Ten – Admire your Work
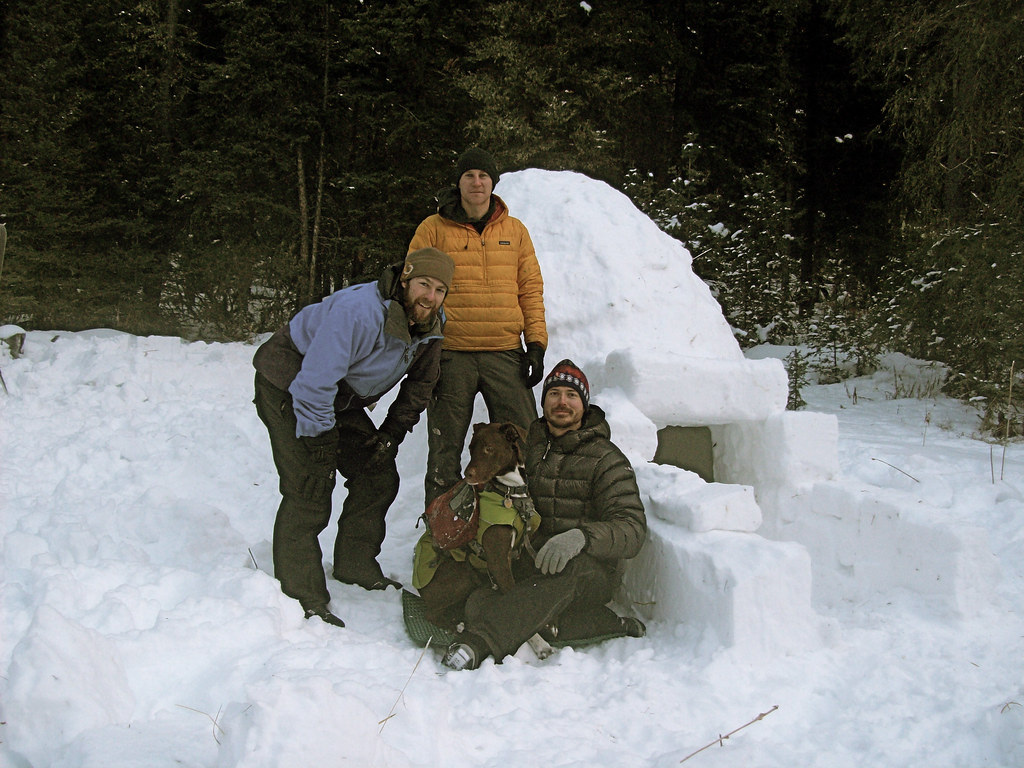


Jon, Mark, Gordie Howe, and Sam


The finished project


Wilderness

“The idea of wilderness needs no defense. It only needs more defenders.”
– Edward Abbey

Food for an Overnighter


Overnight Backpacking Food Rations

I’ve been asked about doing a food-related post a number of times in the past and I’ve decided to make an initial foray into this with a post about overnight trips.  I will probably go into more in-depth food planning for longer trips in the future but for now here goes.

I’ve done backpacking trips as short as a 1/2 day out, spend a night, and a 1/2 day back to hikes as long as being out on the trail getting resupplies for a couple months.  When it all comes down to it however most of us are weekend warriors and we get a backpacking fix through a series of one or two night trips throughout the summer and maybe a week or two trip once every year or every two years.  A lot can be learned from the simple “24 hour” trip and the formula used to plan it can easily be multiplied by however many days one will be out on the trail.

The necessary planning that goes into these trips is extremely simple once you’ve done enough of them.  All that is needed is a simple gearlist to check off before venturing out and a small pantry of easy to grab food items.  That’s it.  Pile up your gear, grab some food, fill your water bottle, and hit the trail.

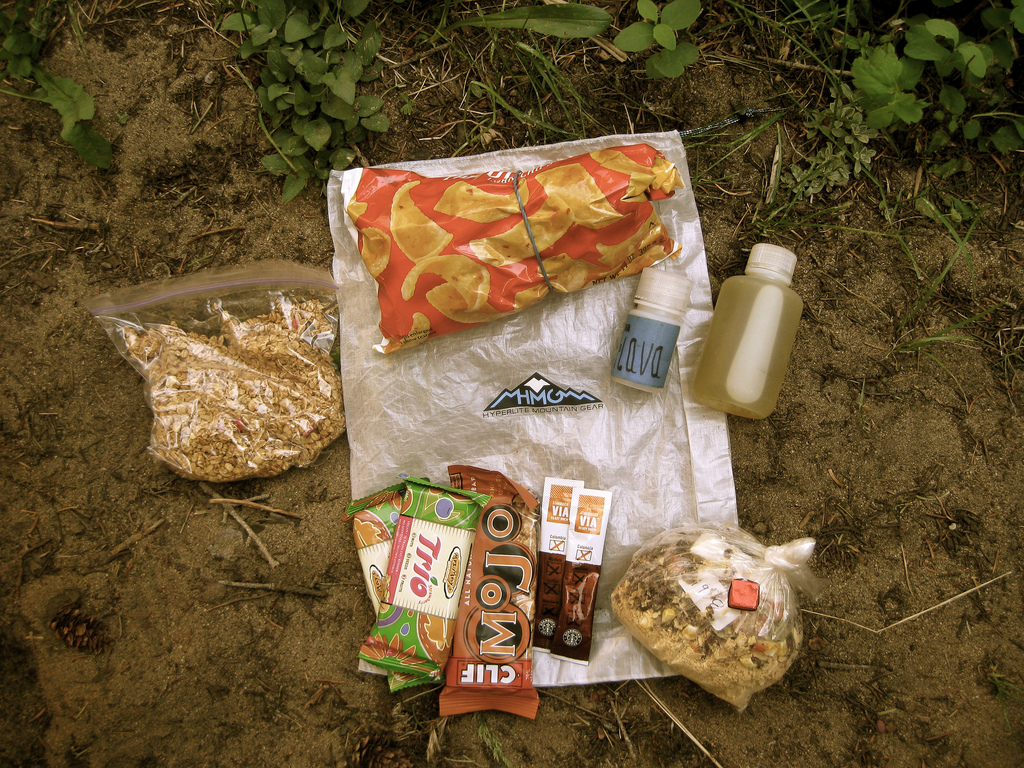
This past weekend three of us set out for an overnighter and I took a picture of the food I was carrying as an example of just how simple it is.  Everything pictured above are items I always have stocked in a box stored in an out of the way cabinet in my kitchen.  In the box are an assortment of bags of granola, packets of coffee, energy bars, chips, and dehydrated dinner choices.  Whatever I feel suits me for the weekend is what I grab.

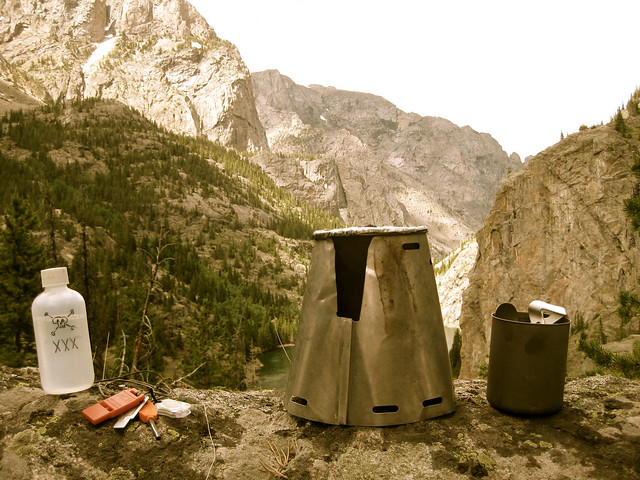
Ultralight Backpacking Cookset

An hour or so is spent on a Thursday evening piling up my gear followed by 30 minutes or an hour with the pile of food and my scale weighing out what is needed.  I use Mike Clelland’s system for food choice which requires each backpacker bring 1.4 lb (.63 kg) of dry food per person per day.  This means that an overnighter will basically consist of a 1/2 day in, a night, and a 1/2 day out which all-in-all adds up to one full day, or 1.4 lbs of dry food.

My morning routine is almost always granola and coffee for this kind of trip.  On longer, big mile trips I may not heat water in the morning so coffee may wait ’til the late morning or be consumed cold but on a chill trip a relaxing cup of morning joe is pretty much the best way anyone can spend any time and that’s all I have to say about that.  Lunch and snacks for me are a combination of energy bars, chips, summer sausage, and cheese.  A nice balance of sweet food and savory foods is good because you don’t always know what mood you’ll be in and what kind of food you want.  If all you have is choco-minty-sugar-flavor energy bars and all you want to eat is salt-bomb-chip-nom-noms you might be let down.

Dinner is the most artistic and varying bit of my “formula”.  I vary in dinner foods from the super simple (ramen noodles covered in instant sausage gravy) to the gourmet (shrimp tettrazini cooked and dehydrated beforehand at home).  For easy to store pantry stuff I recommend instant mashed potatoes, ramen noodles, instant dry sauce packages, and whatever sort of dehydrated goods are available at your local grocer (corn chowder, split pea soup, dehydrated beans, et al).  Above is a combination of dehydrated corn chowder, beans, and assorted dried veggies, topped off with a beef bouillion cube.  I almost always carry a small plastic bottle full of olive oil (easy, dense, cheap calories) and a bottle of some sort of salt/pepper/Lowry’s/whatever type of seasoning.

The pictured quantity of food is tiny and fits into the bottom 1/3 of a 12.5×20 OPsak odor proof sack which is then put into a stuff sack.  The one photo’ed is a Hyperlite Mountain Gear cuben sack that is about as finely produced a stuff sack as exists on the market today.  The whole thing gets run into a tree on a 2.2mm piece of dyneema cord attached by a mini carabiner and will hang all nice and snug while I slumber away under my tarp a hundred meters away.

Happy nomming!

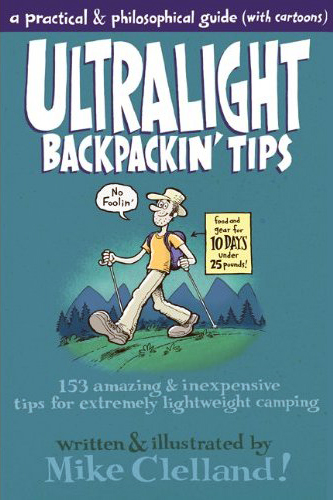
Ultralight Backpackin’ Tips by Mike Clelland!

I am friends with a lot of backpackers. I met a few through the internet, some randomly along the trail, others I’ve had the pleasure of working and guiding alongside. One of the most knowledgeable and accomplished of these is Mike Clelland!, a man who has spent thousands of nights in the backcountry ranging in territory from just outside his humble shack along the Tetons of Idaho to the glacier-strewn wilds of the Alaskan Wilderness.

Mike has a career history that spans quite the range. From drawing pictures on the Big Apple’s Madison Avenue scene to leading kids into the woods for weeks on end as a N.O.L.S. instructor he’s been there and done that. These two very different career paths can only merge in a select few ways. One of them is his passion for illustrating cute little backpackers and skiiers alongside the educational written word of his colleagues. He’s got his name listed on a handful of smart, witty, educational, and relevant book titles. Recently Mike struck out on his own and opted to pen not only the illustrations but the written tips of a new book entitled “Ultralight Backpackin’ Tips – 153 Amazing & Inexpensive Tips for Extremely Lightweight Camping”


Mike Clelland - Ultralight Backpackin' Tips

Buy this book from Backpacking Light and read it.  Mike’s ability to balance humor and sensitivity alongside rigorous weight-reduction is amazing.  Right-brainers and left-brainers alike will read this and find themselves both amused by the whimsy of each page as well as astounded by the practical wisdom contained within.

“Ultralight Backpackin’ Tips – 153 Amazing & Inexpensive Tips for Extremely Lightweight Camping”

How Can a Gear List Work For You?

Like a good number of readers of this blog I enjoy going over my gearlists. Gear gets old and needs replacing, new gear needs trying out, gear that is redundant gets left at home – the reasons a gear list can change are countless. Having an up to date gear list typed, organized, and at the ready is key to trip planning. Particularly, having a gear list at the ready, printed and posted near your gear or near the area that you arrange your gear for a trip is extremely helpful in expediting the preparation process.

For the past few years I’ve gone backpacking nearly ever summer weekend. I typically work until late afternoon on Friday and want to be able to head out the door immediately when done so I often pack for a trip on Thursday evening. In order to make this go as smoothly and efficiently as possible I had the idea a couple years ago to print my gear list and tape it to my wall. For the past year my roommate and I both reference two lists taped to the wall of our kitchen – one contains everything you need for a summer backpacking trip, the other for a day trip splitboarding.

Since my roommate and I both have different brands of gear and since choices between brands or models of gear may vary from trip to trip I find a generic list to be most effective. The list is broken down into a few columns:

  • Category – an organizational column such as ‘clothing’, ‘packing’, ‘repair’, ‘electronics’, et al
  • Item – referring to item type, aka ‘map’, ‘pants’, ‘backpack’, ‘tarp’, etc
  • Worn – the weight of any item that is worn on your person
  • In Pack – the weight of any item not always worn but more typically found in your pack

Of the above columns if you were even more a minimalist you could simply list all your “items”, leaving off the category and weights. I appreciate the Category column however as it allows me to mentally group pieces of kit together in my head as I mentally check off the list.

I’ve posted a gear list to the wall of the kitchen because it has a large section of floor space onto which gear can be piled. All my gear is stored in bins adjacent to the kitchen in my garage and the bins are loosely organized similarly to the categories listed on the spreadsheet. For instance, to start I would pull the shelter bin down off the shelf and grab the most fitting shelter for my trip. Next I would pull the Cooking/Hydration bin down and find the necessary water bottle, utensil, stove, pot, water treatment, et al.

I find that the majority of the list is in my head and I can grab items willy-nilly from the bins, throwing them into a pile on the floor without looking at the list. Then, once I can’t think of any more items to grab I go to the list and read it from top to bottom, specifically resting my eyes on each line so as to not gloss any one item over. Once I come to a list item that I have not yet added to the pile I immediately go get it, add it to the pile and continue reading down the list. This attention to detail will seem silly and wasteful to some but to me it avoids something that I consider really wasteful and silly – – getting halfway to a trailhead and having to turn around because you realize you forgot your hiking shoes.

Use this list as a template by viewing the shared document entitled gearlist_generic_summer.ods.

Gearlist Generic Summer

The Art of Glissading

Wikipedia defines glissading as the

“..voluntary act of descending a steep slope of snow in a controlled manner either for the sheer thrill of the ride or to bypass tedious scree.”

During the summer of 2009 I co-guided a course in ultralight backpacking for the Backpacking Light Wilderness Trekking School alongside Andrew Skurka and Glen Van Peski in the beautiful Wind River Range of Wyoming. One afternoon as we were descending along painfully slow scree fields (I believe off Wind River Peak) we opted to speed things up and glissade some perfectly pitched snowfields.

View the embedded video “Glissading in the Wind River Range” on Vimeo.

Sling It and Swing It

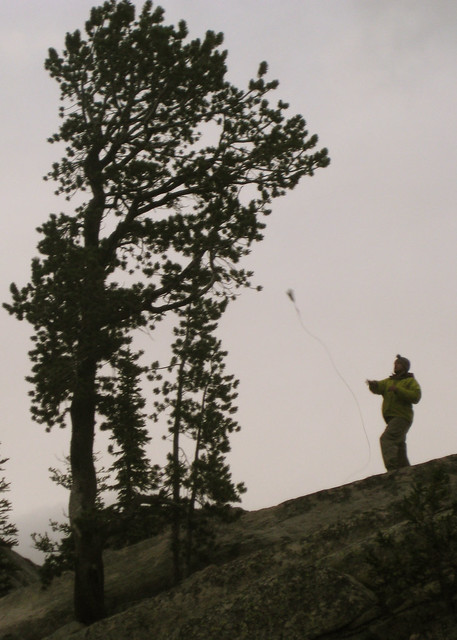
Mike throws the bear rope
Mike throws the bear rope in the Beartooths

Southwest Montana is home to wildlife aplenty.  Grizzly bears and black bears have free roam over a landscape that is millions and millions of acres and as such when people opt to cohabitate with these big critters certain precautions must be taken.  Above is a photo of Mike beginning the process of preparing a food hang called the PCT Method, described in the article Bear Bag Hanging Techniques at Backpacking Light

Splitboarding – One Day Gearlist

Clothing

  • Gloves – spring touring  
  • Gloves – shell mits  
  • Hat – merino wool  
  • Hat – visor (condition dependent) 
  • Jacket – shell  
  • Jacket – puffy  
  • Pants – shell / softshell (weather dependent)  
  • Goggles
  • Helmet – condition dependent  
  • Shirt – baselayer 
  • Boots – soft snowboard boots  
  • Socks – knee high  
  • Underwear – merino or polypro  
  • Sunglasses – shaded and clear lenses  
  • Tights – merino or polypro  

Snowboard Gear

  • Snowboard – splitboard  
  • Binders – splitboard-specific  
  • Crampons – splitboard-specific  
  • Skins – splitboard-specific  
  • Poles – collapsible carbon fiber  
  • Straps – condition dependent  
  • Pin – extra binder pin  

First Aid and Repair

  • First Aid – wound care kit  
  • First Aid – splint  
  • First Aid – ace bandage  
  • Compass – adjustable declination  
  • Documents – I.D. / cash / credit  
  • Knife – small, light  
  • Info – maps and guidebook pages  
  • Whistle – on neck lanyard  
  • Tool – snowboard/binder repair tools  

Electronics

  • Camera – digital camera (possibly use phone)  
  • Light – headlamp  
  • Watch – altimeter enabled watch  

Avalanche Gear

  • Avalung  
  • Backpack – size is trip-length dependent  
  • Shovel – metal avalanche shovel  
  • Beacon – multi-antennae digital  
  • Saw – snow saw  
  • Rutsch Saw   
  • Probe – collapsible, lightweight  
  • Snow Study – slope meter, crystal cards, magnifier  
  • Stuff Sack

Emergency Gear

  • Pad – foam pad  
  • Bivy – emergency bivy  
  • Firestarting – lighter, matches, firestarter  
  • Cordage – 40′ of spectra cord  
  • Sunscreen
  • Mug/pot – titanium mug for emergency h20 boiling  

Blog Action Day – Sulfide Mining in the BWCA

October 15th, 2010 is Blog Action Day, an annual event that unites the world’s bloggers in posting about the same issue on the same day with the aim of sparking a global discussion and driving collective action. This year’s topic is water.

I’ve opted to post a short treastise on the subject of sulfide mining and how it poses imminent danger to one of the greatest watersheds in the world, the Boundary Waters Canoe Area Wilderness and Quetico Provincial Park. Sulfide mining, which extracts copper, nickel and other metals from sulfide ores has “…decimated water supplies, killed fish, destroyed entire landscapes, and left taxpayers holding the bag for expensive clean-up operations almost everywhere it’s been done before” according to the Friends of the Boundary Waters, a non-profit group who’s mission is “to protect, preserve and restore the wilderness character of the Boundary Waters Canoe Area Wilderness and the Quetico-Superior Ecosystem.”

Visit the Friends of the Boundary Waters to learn more about the debate over mining, jobs and the environment taking place all over the world and particularly in the vast lakes and forests of the Boundary Waters and Quetico Provincial Park.

Below is a representation of the stunning beauty and tranquility that is to be found in the quiet, northern reaches of the United States.

Boundary Waters Part 2 from Alex Horner on Vimeo.

Alcohol Stoves

I’m very passionate about ultralight backpacking and as such my friends and acquaintances who find themselves interested in finding ways to lighten their pack are often asking advice or looking to borrow gear.  Since I have both ample advice and gear to give out I enjoy being able to lend a hand or an opinion when it’s solicited.

I have a friend here in Bozeman who is an ice climber, backcountry skiier, and backpacker.  She recently got sick and tired of toting huge loads miles into the backcountry in order to attempt a remote peak and has since begun the process of refining and re-thinking what she carries on long approaches.  She is a realist however, and understands camping comfort when the situation allows it.  This approach has proven to her that carrying less of something can mean more of something else so she’s trying to find that magical balance between a comfortable load and a comfortable lifestyle.

Last evening she came over to my house to look at my alcohol stove collection.  She, a friend, and two dogs will be trekking into the Wilderness around Jackson, Wyoming and they will have a Snowpeak 900mL pot and the associated Caldera Cone and “Coke can” stove from Trail Designs to match.

Lend out and teach a friend to use a piece of UL gear and you just might find a new partner for your next trip into the backcountry!