
Fulfillment In the past few years I’ve found the best way to maximize the amount of enjoyment I gain from a backpacking trip is to spend time before the trip researching, mapping, and planning. Then, upon my return home I opt to spend time cataloging, memorializing, and sharing the trip through my Web site, a photo-sharing site, and a trip-sharing site.
This is the first of a two-part blog series in which I will discuss my pre and post trip processes. If you find all of this silly and would prefer to read only about activities during a backpacking trip, feel free to explore this site as I have dozens of trips cataloged herein.
Part One: Planning and Research
My research and trip planning involves a multi-pronged approach, but the most time is spent poring over maps, both paper and digital. I generally start the process using a large-scale area map to hone into the particular mountain range, drainage, or zone that I’d like to explore. After that has been determined I scale down the area of precision using my computer.
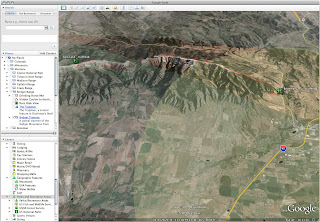 I primarily use the Google Earth software with a free USGS topographic map overlay installed. Once I’ve zoomed in on the area I determined to explore I use a series of Google Earths tools to map out my route and points of interest. I first make the USGS topo layer visible so that I can see any trails or other man-made features that are present in the area I want to explore. I next trace my chosen route into a new Earth layer using the “Add Path” tool. I turn the topo layer on and off to see how my route looks on the satellite image as well as on the map image. Next I use the Google Earth “Add Placemark” tool to mark the location of trailheads, possible campsites, or other locations of note along my route.
Within the Google Earth software I organize my routes within a folder structure. I have a folder for each of the states in which I’ve done trips. Within the folder for the particular state are sub-folders that are based on areas, whether that be a mountain range, a long trail, or a park. For instance in my folder entitled Montana there are sub-folders for the Bridger Mountains, Yellowstone, and Continental Divide Trail. Within the sub-folder there is yet again another series of folders – one for each trip. If I opt to hike a route twice but do it slightly different I may make a new folder that has information specific to it.
Google Earth is a great way to look at a trail from various points of view. You can see your route from above as if looking at a map or you can see it from a birds eye view at an angle from the sky, and you can even maneuver yourself along the trail at ground level to get a feel for how the terrain feels before you get there.
Part One: Data and Analytics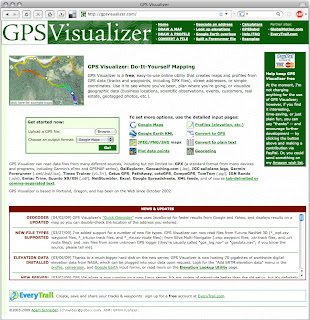 I’m an analytical person as well as a spatial person and maps aren’t enough information in my thirst for data. For this reason I like to extrapolate specific mileage and elevation data from the mapped information. This is where a very useful Web site, GPSvisualizer.com comes in handy. There are a multitude of functions that this online software can perform but I find a handful of them most useful.
The first step in turning the pretty little map I’ve created into rows and columns of data is to export a .kml file of my route from Google Earth. This is done by selecting the trip folder, right-clicking on it, and selecting “Save Place As”. This will save all your path and placemark information in the .kml file format. The .kml file can then be turned into a number of other file formats using GPSVisualizer.
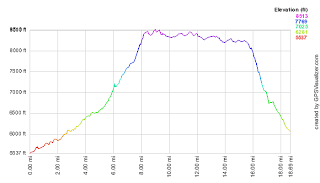
Using the “Convert a File” link at GPSVisualizer I am able to create a spreadsheet that contains mileage data. This information can then be entered into the form at the “Look up Elevation” link. A third step allows me to create a section profile of the entire route. A section profile is graphical analysis of the route depicting mileage and elevation information.
Part One: Conclusion
To summarize, in this post I’ve discussed the use of paper maps, Google Earth software, and the GPSVisualizer.com Web site to research and view potential trip routes. I have a number of routes that I’ve prepared, but not yet hiked. These provide a fun way to dream of places to go in the backcountry.
Stay tuned for the next installment in which I impart wisdom of how I go about sharing a trip with friends, family, and other onlookers whom may be interested in that trip themselves or just interested in what I’m doing after I’ve returned home. Some of the tools I use for that are my Web site, Flickr.com, and EveryTrail.com. But that’s enough of a sneak peek – – until next time, happy hiking.